# Synology
Pomerium can be used to enable secure access to services on your Synology home server or network attached storage (NAS) device. Pomerium acting as an identity aware access proxy is particularly useful as many self-hosted apps (opens new window) lack or have insufficient built-in authentication mechanisms.
Using Pomerium on your Synology DSM device enables:
- Secure remote access to docker and synology web-applications without a VPN.
- Unified, multi-factor authentication with your identity provider of choice.
- Access to services by sub-domain (e.g.
plex.int.nas.exampleorwiki.int.nas.example) - TLS everywhere.
Pomerium is lightweight, can easily handle hundreds of concurrent requests, and a single instance typically uses <20MB of memory and very little CPU.
# Prerequisites
- A docker-capable (opens new window) synology product
- A Google Cloud Account (opens new window)
- A configured identity provider
- TLS certificates
Though any supported identity provider would work, this guide uses google.
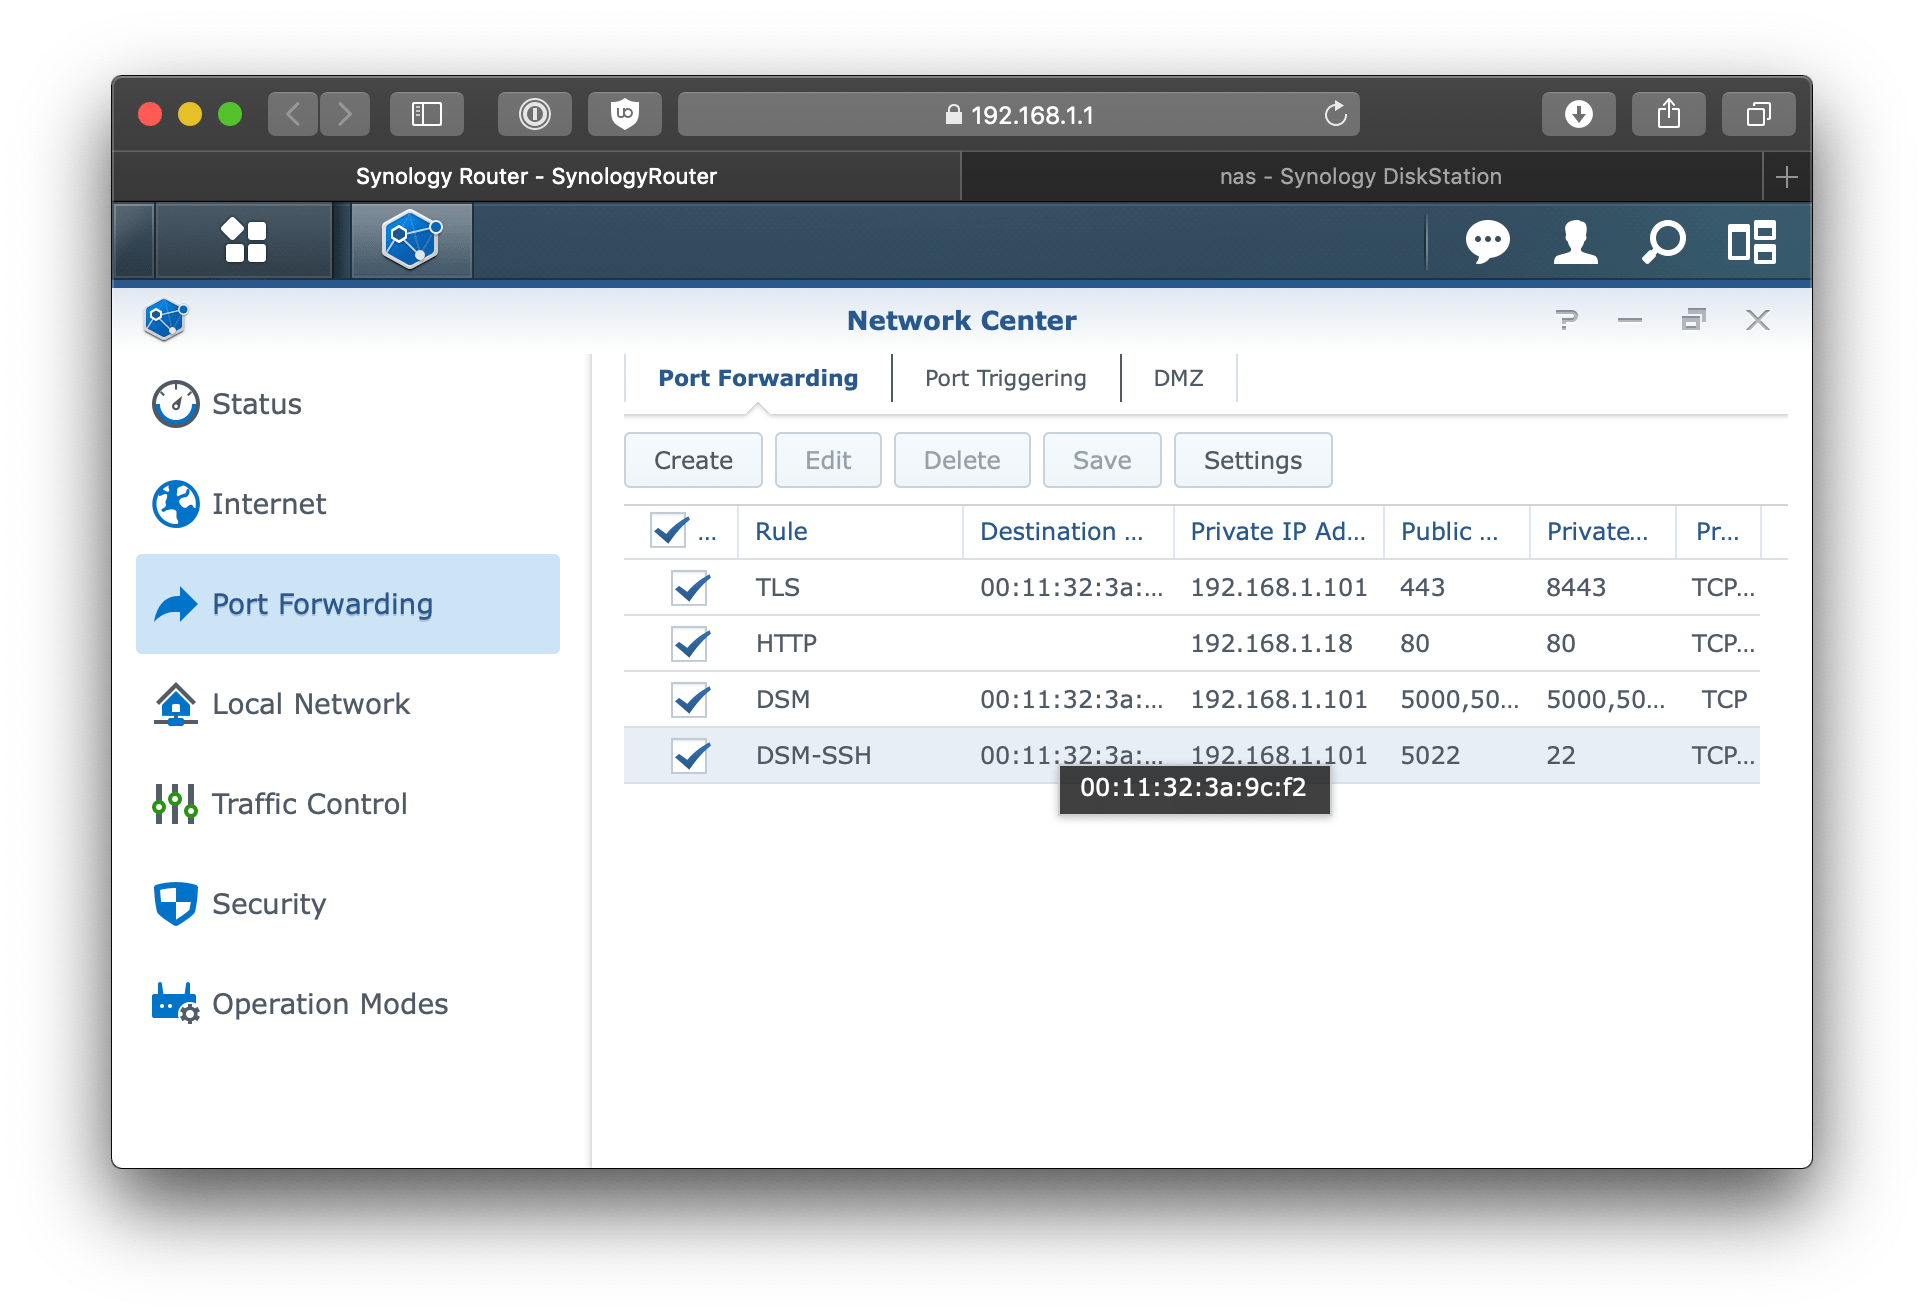
# Port forwarding
This will vary depending on what type of router you have but the gist is you want to be forwarding all HTTPS/TLS traffic from port 443 to your NAS on some high port (in this case8443).
# DSM
Diskstation manager (opens new window) uses nginx (opens new window) under-the-hood to proxy incoming requests. In the following steps, we'll configure DSM to handle incoming requests and certificates.
# Configure DSM's Reverse Proxy
Go to Control Panel > Application Portal > Reverse Proxy.
Click Create.
Set the following Reverse Proxy Rules.
| Field | Description |
|---|---|
| Description | pomerium |
| Source Protocol | HTTPS |
| Source Hostname | * |
| Destination Port | 8443 |
| HTTP/2 | Enabled |
| HSTS | Enabled |
| Destination Protocol | HTTP |
| Destination Hostname | localhost |
| Destination Port | 32443 |
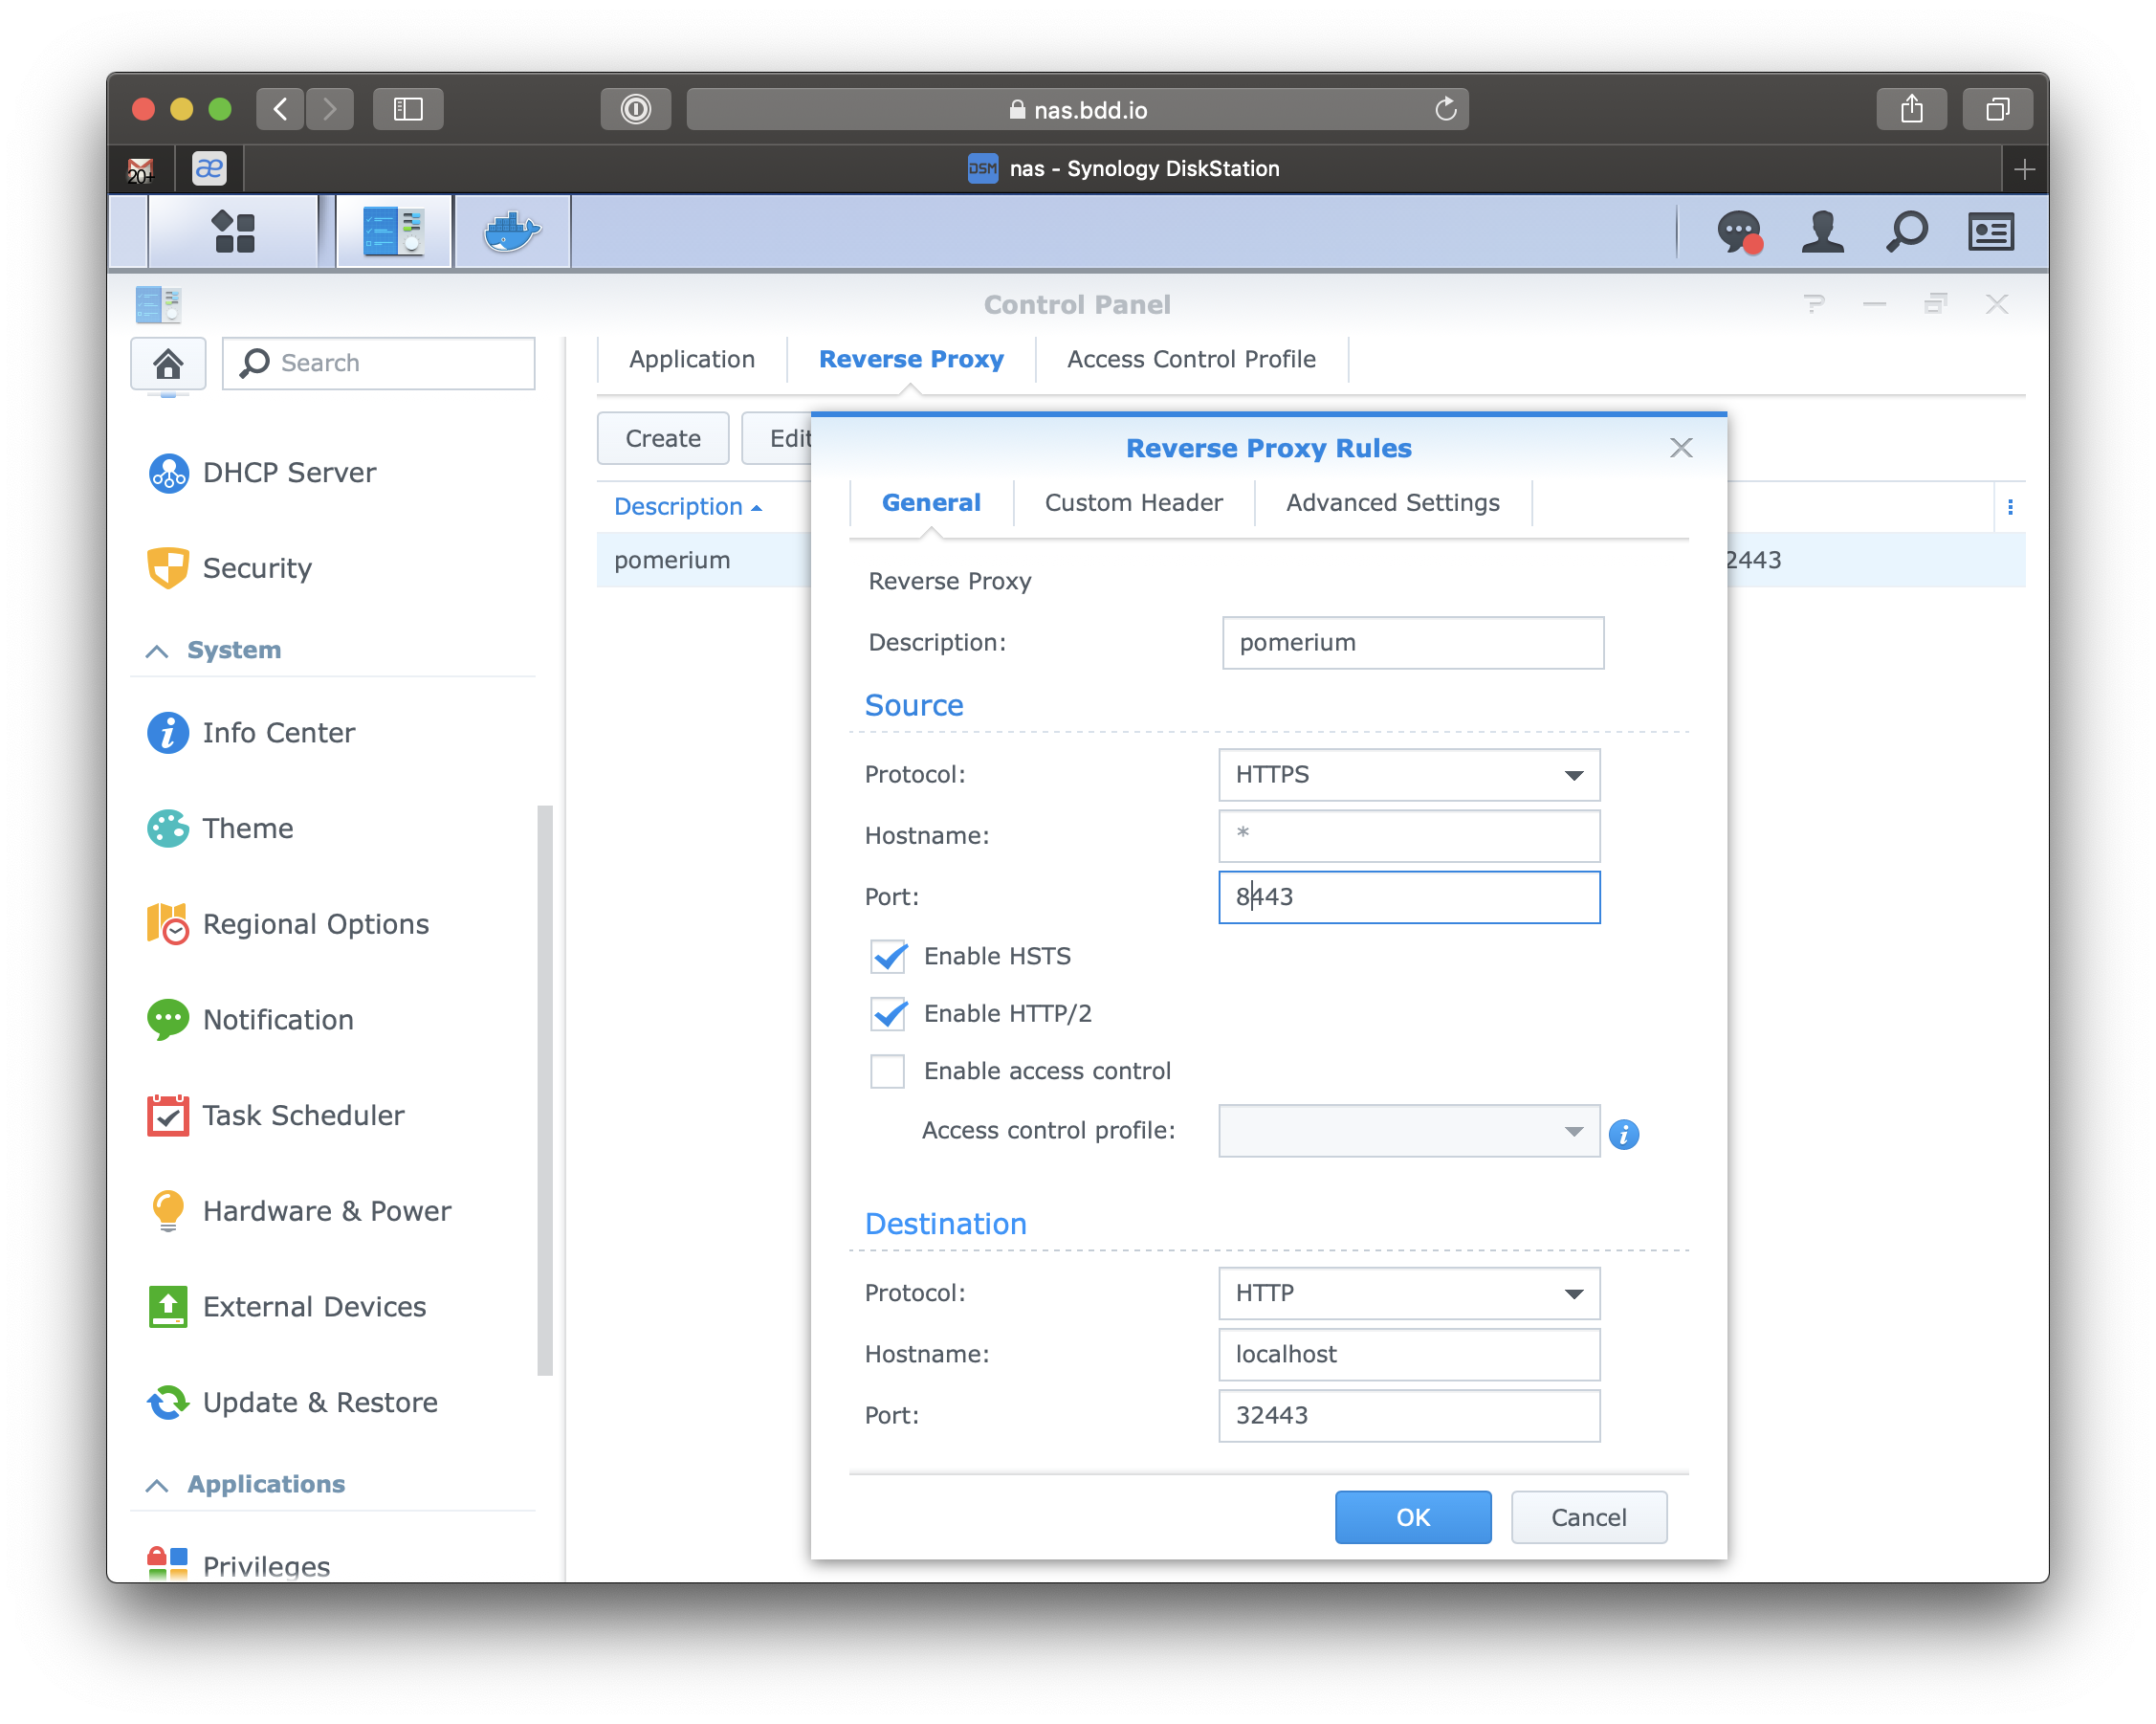
This will forward any incoming HTTPS traffic to the Pomerium service that is (not yet) running on port 32443.
# Certificates
Though DSM does support getting LetsEncrypt (opens new window) certificates, they do not support wild-card subdomain certificates which require DNS validation. If you do not already have a wildcard certificate the certificate documentation or included [script] can help you generate one.
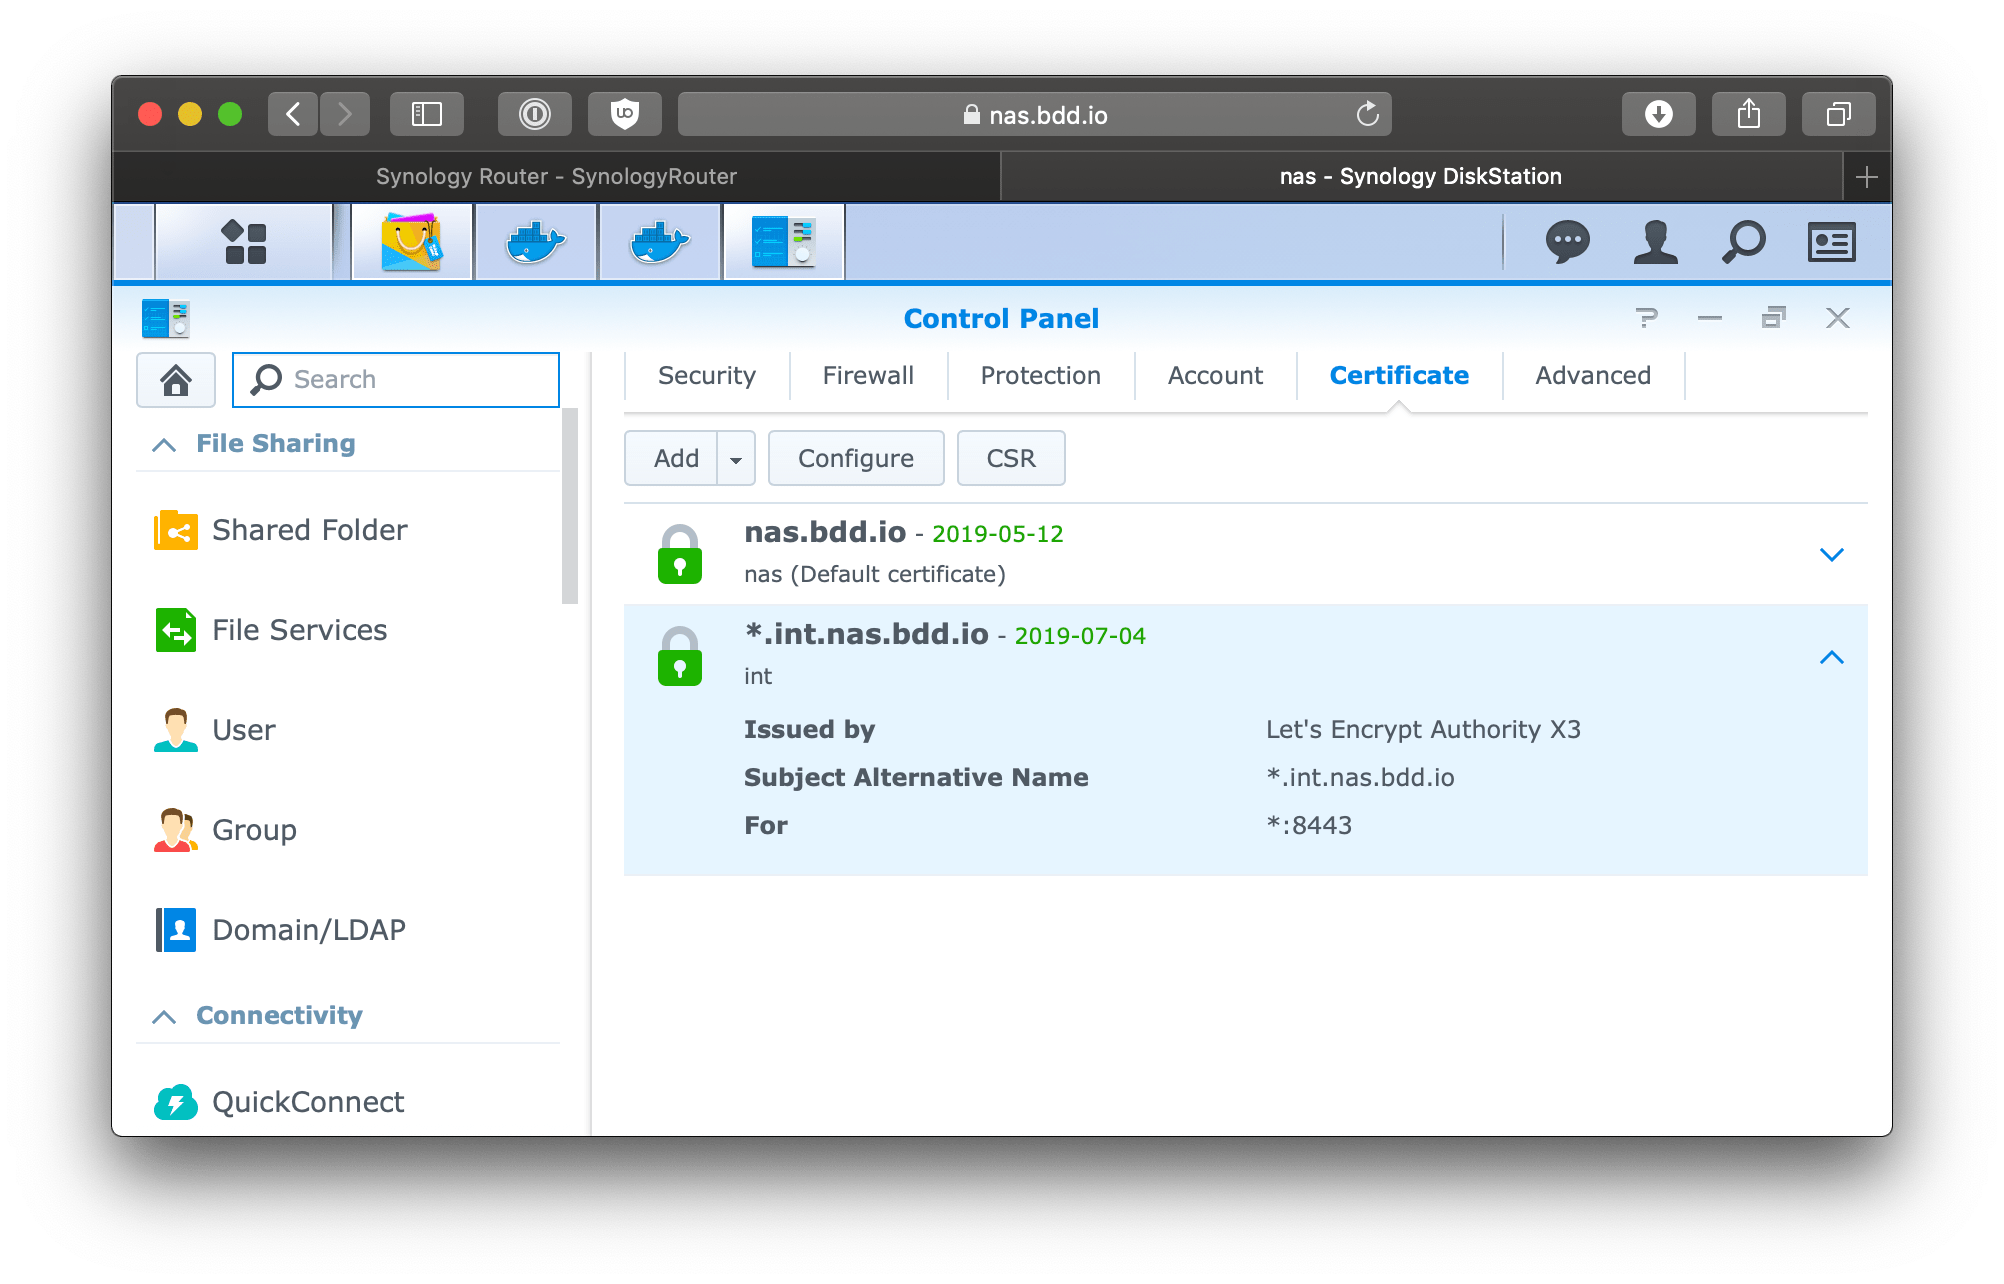
Go to Control Panel > Security > Certificate
Click add a new certificate > Import certificate.
Add the certificate chain for your wild-card subdomain certificates.
Once the certificate is showing on the list of certificates screen we need to tell DSM to use that certificate for all incoming traffic on port 8443.
Click configure
| Services | Certificate |
|---|---|
| *:8443 | *.int.nas.example |
# Docker
# Download
Download and install docker from the package manager.
Package manager > search > docker
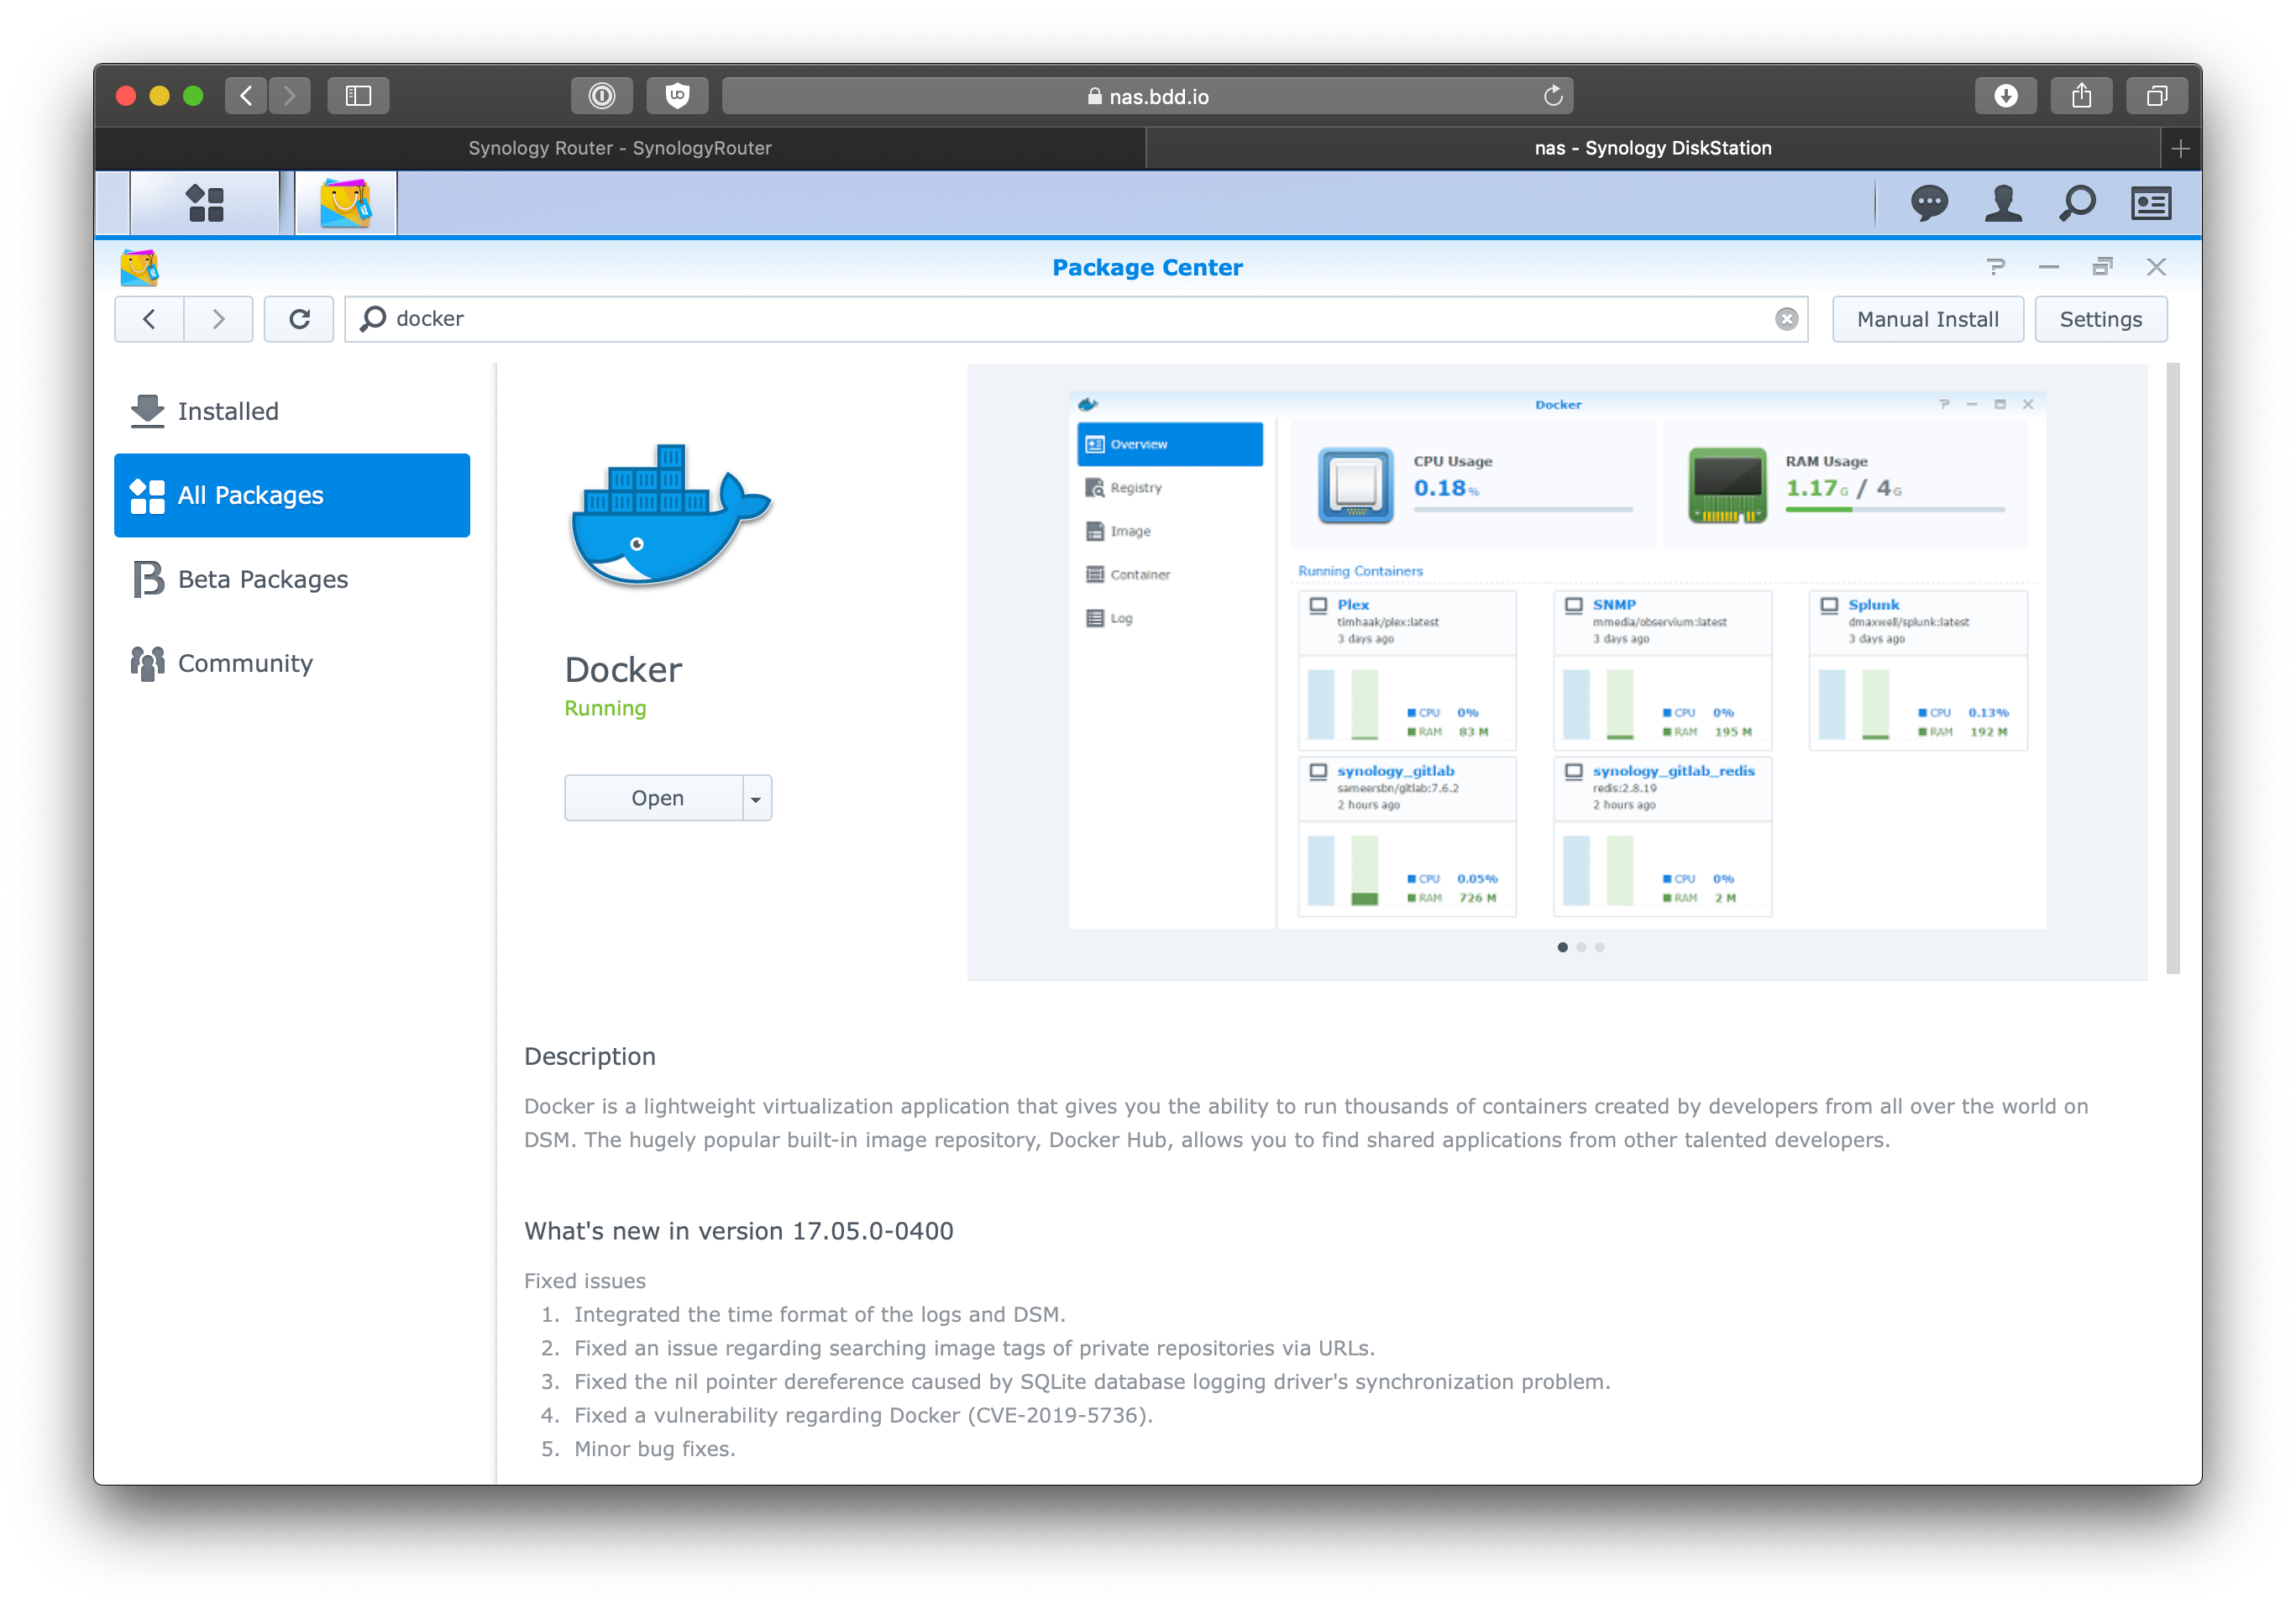
Once installed open the docker app.
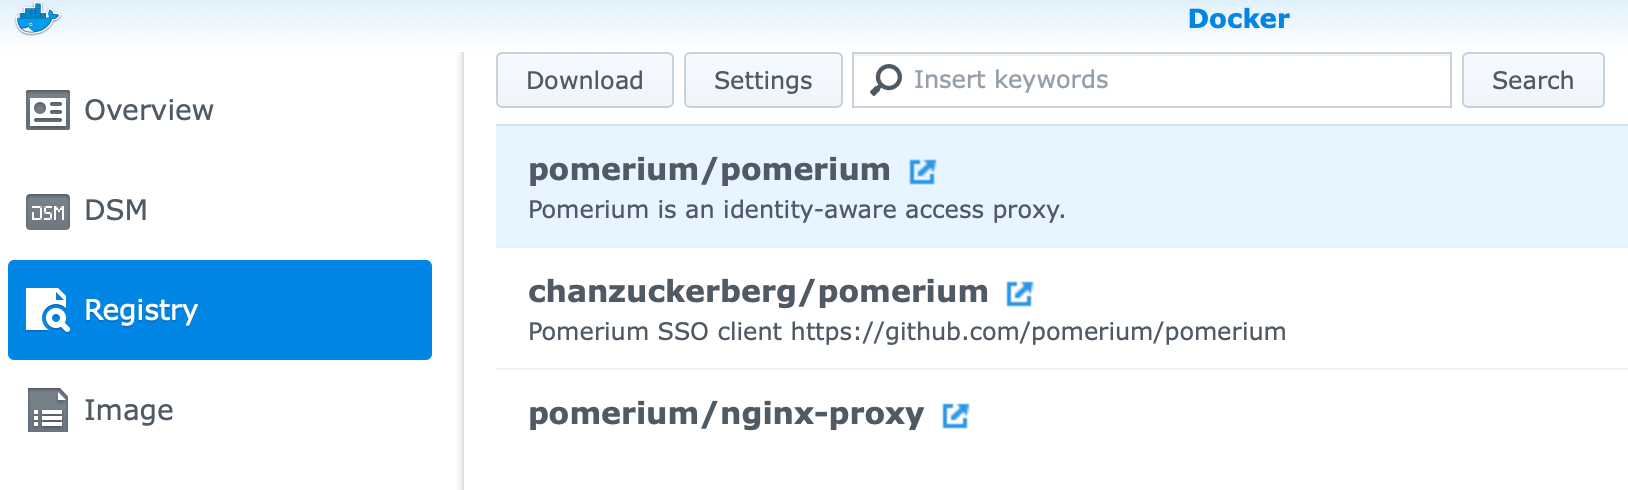
Docker > Registry > search > pomerium
Download the official Pomerium docker image.
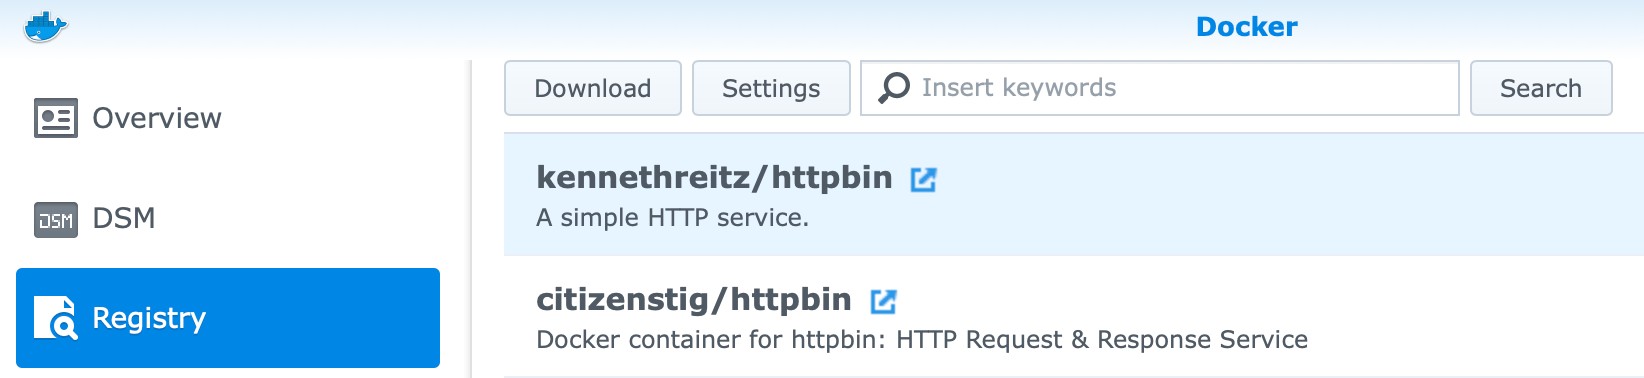
We'll also need a test application to manage access to. For this guide we'll use the canonical test app httpbin (opens new window) but the this could be any self-hosted apps (opens new window), wiki, download tool, etc.
# Policy
We will create an extremely basic policy where httpbin.int.nas.example is replaced with the subdomain you want to use for the httpbin service, and your.email.address@gmail.com is replaced with your email address. All other users will be denied, and all other routes will be 404.
# policy.yaml
- from: https://httpbin.int.nas.example
  to: http://httpbin
  allowed_users:
    - your.email.address@gmail.com
# Configure
# Httpbin
First, we'll setup our test app httpbin (opens new window).
Go to Docker > Image
Click httpbin
Set the Container Name to httpbin. Keep the rest of the settings the default.
Click apply
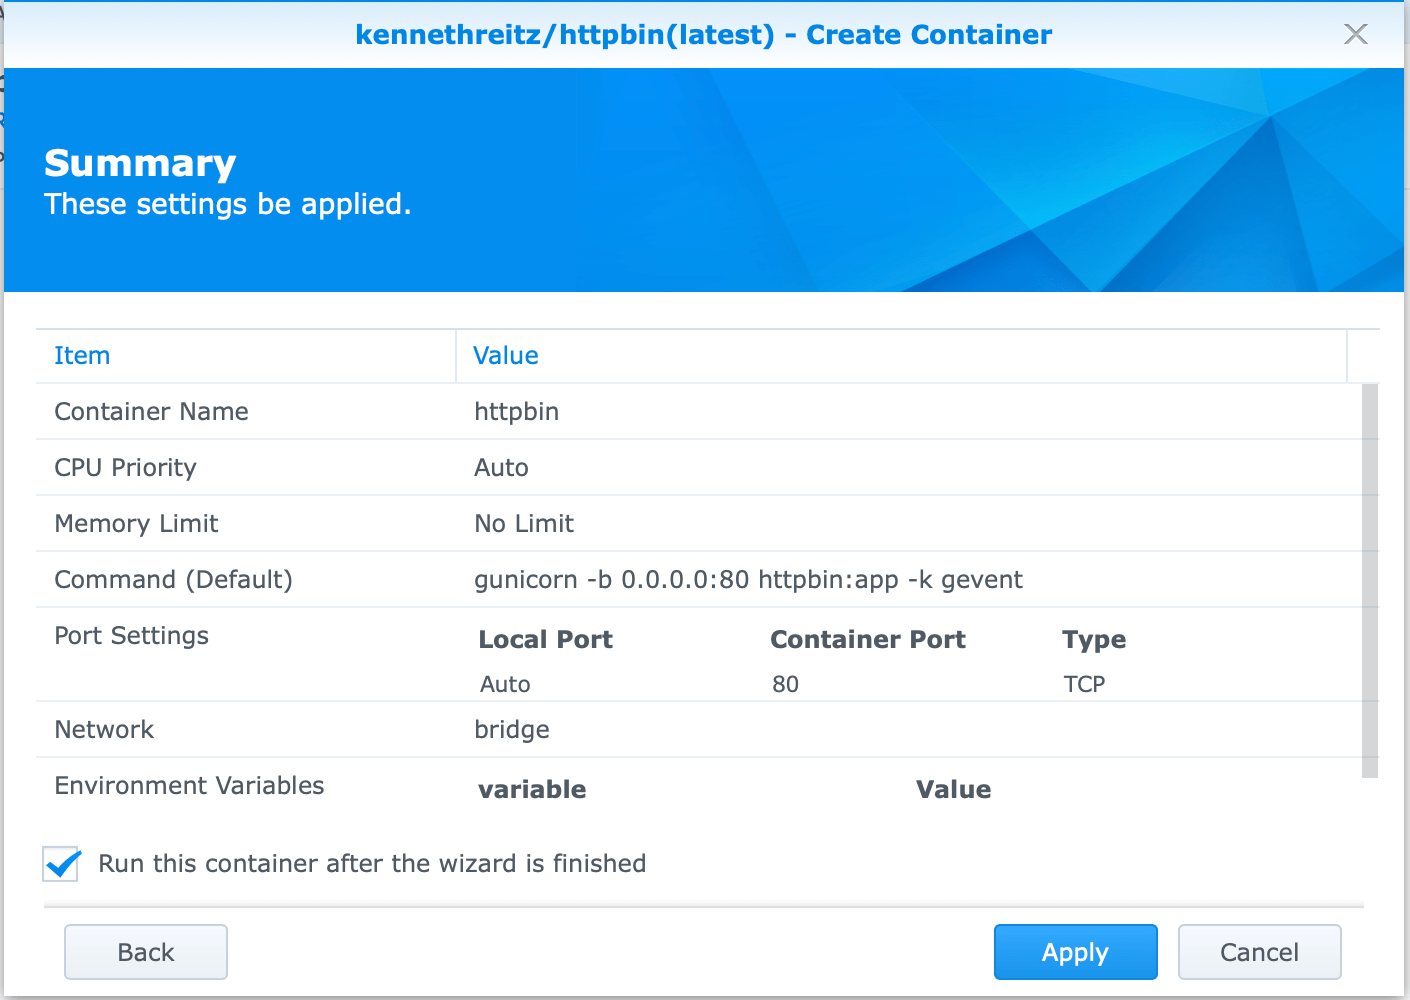
This will create a small python webserver on port 80. The container name we just used will be used as an alias to route requests as defined in our policy.
# Pomerium
Go to Docker > Image
Click Pomerium
Click Launch
Set the Container Name to Pomerium.
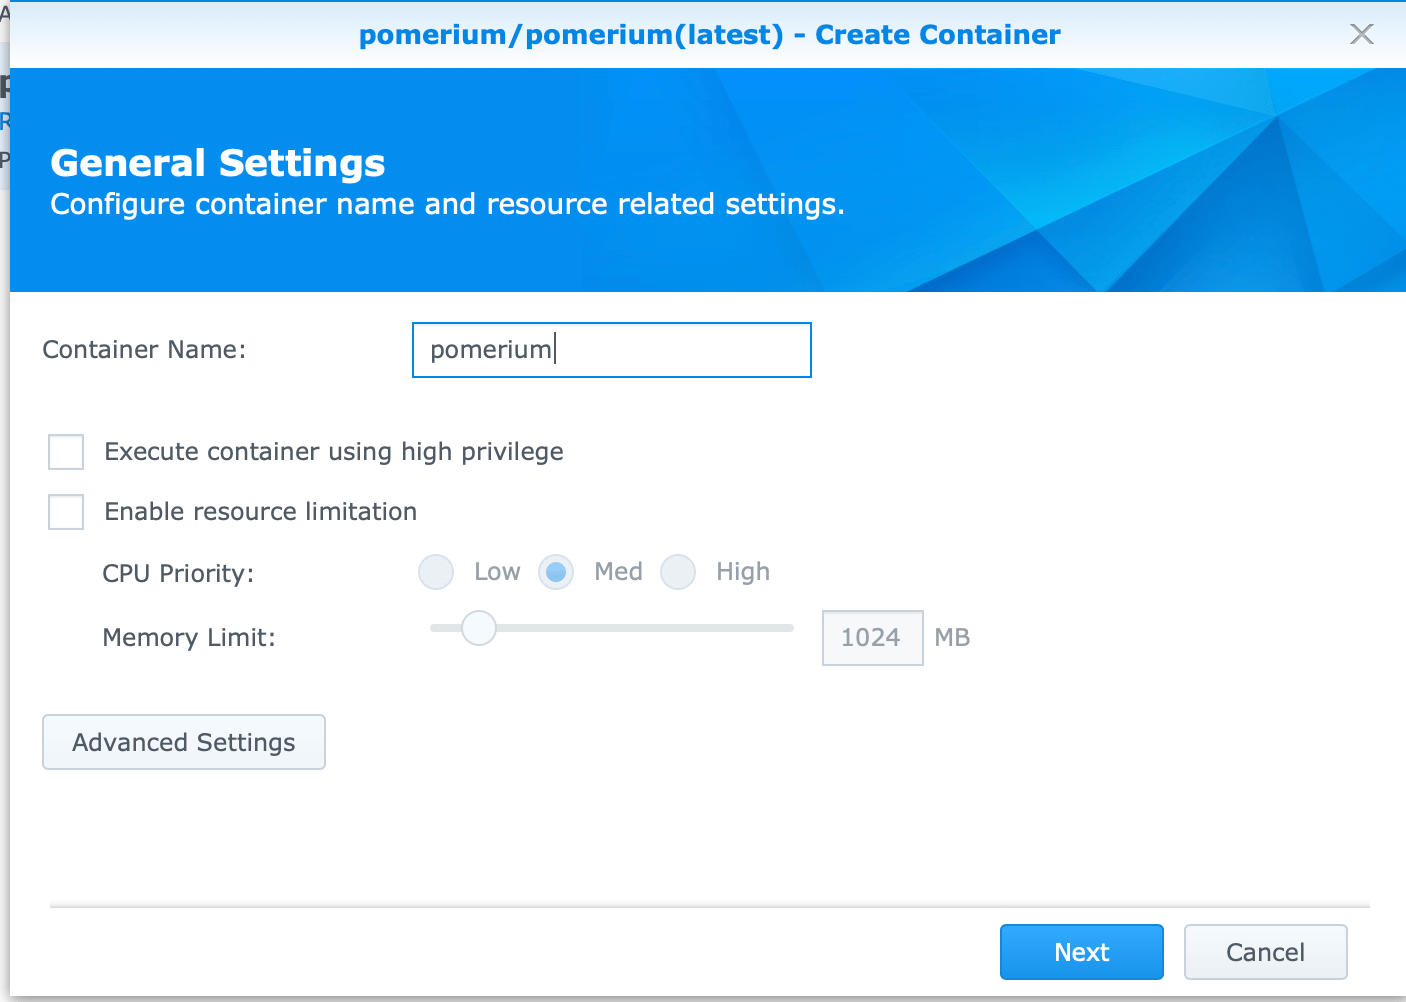
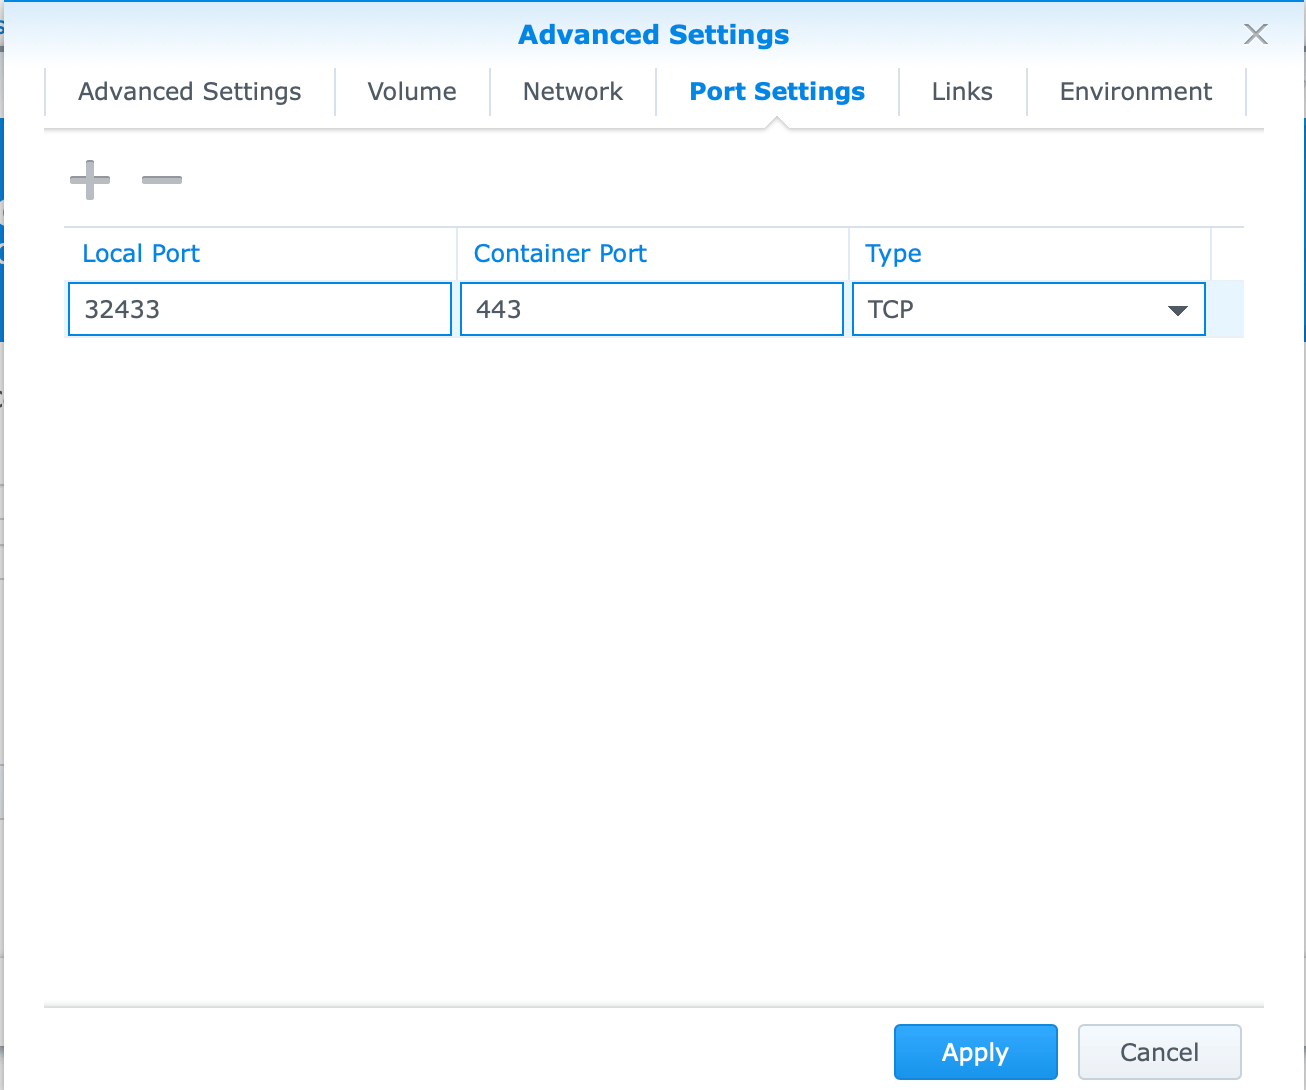
Click Advanced Settings
Go to Port Settings tab.
Add an entry where the Local Port is 32443 and the container port is 443 and the type is TCP.
Go to Links tab.
Add an entry where the Container Name is httpbin and the alias is httpbin.
WARNING
The alias value must match the to DNS name from your policy.yaml configuration.

These are the minimum set of configuration settings to get Pomerium running in this deployment environment.
Go to Environment tab.
| Field | Value |
|---|---|
| POLICY | output of base64 -i policy.yaml |
| INSECURE_SERVER | TRUE, internal routing within docker will not be encrypted. |
| IDP_CLIENT_SECRET | Values from setting up your identity provider |
| IDP_CLIENT_ID | Values from setting up your identity provider |
| IDP_PROVIDER | Values from setting up your identity provider (e.g. google) |
| COOKIE_SECRET | output of head -c32 /dev/urandom | base64 |
| AUTHENTICATE_SERVICE_URL | https://authenticate.int.nas.example |
| SHARED_SECRET | output of head -c32 /dev/urandom | base64 |
For a detailed explanation, and additional options, please refer to the configuration variable docs. Also note, though not covered in this guide, settings can be made via a mounted configuration file.
Click Launch.
If properly configured you should see something like the following when you see the container's details.
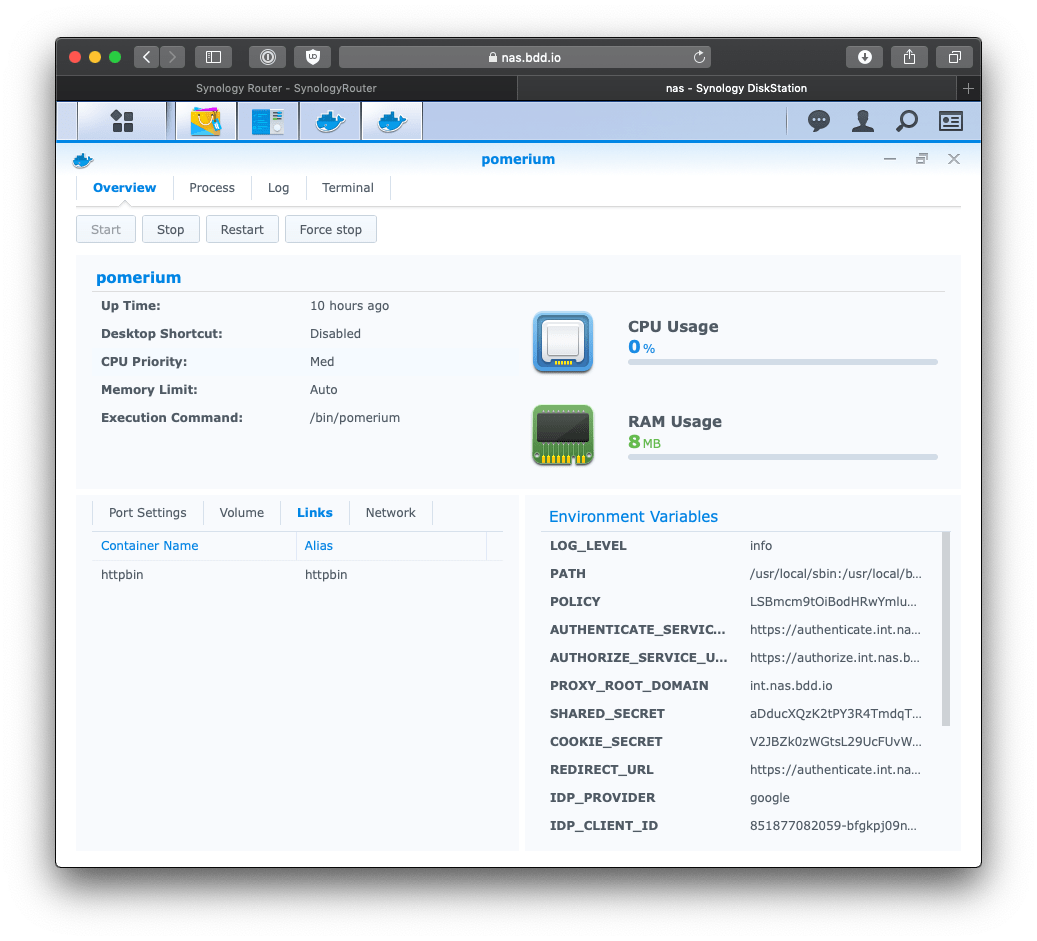
If something goes wrong, click the Logs tab.
# Try it out
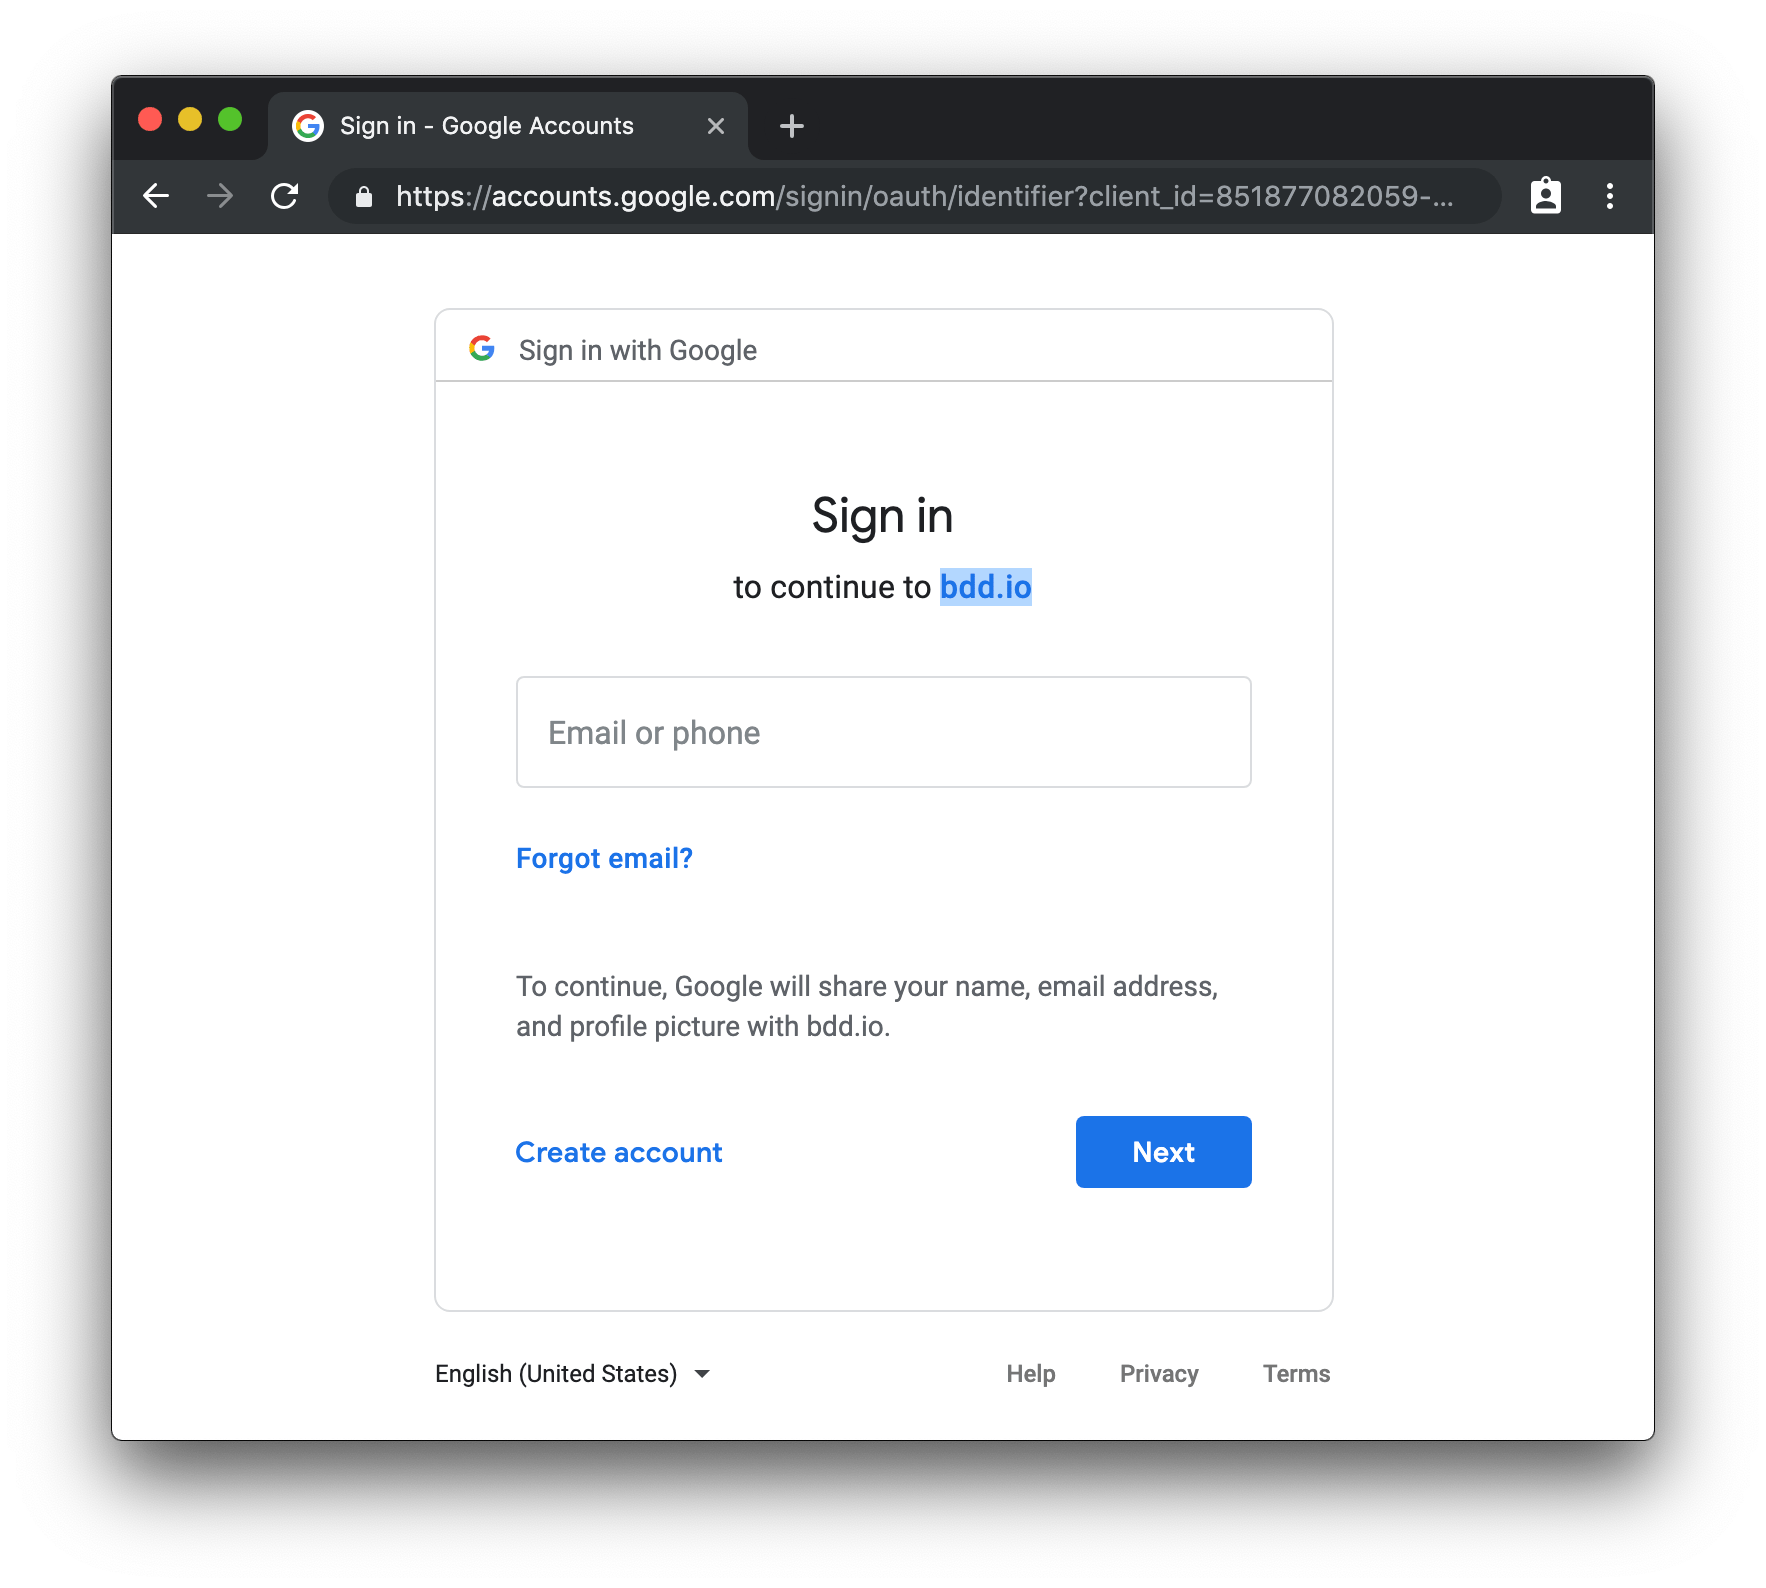
Navigate to your new service. https://httpbin.int.nas.example
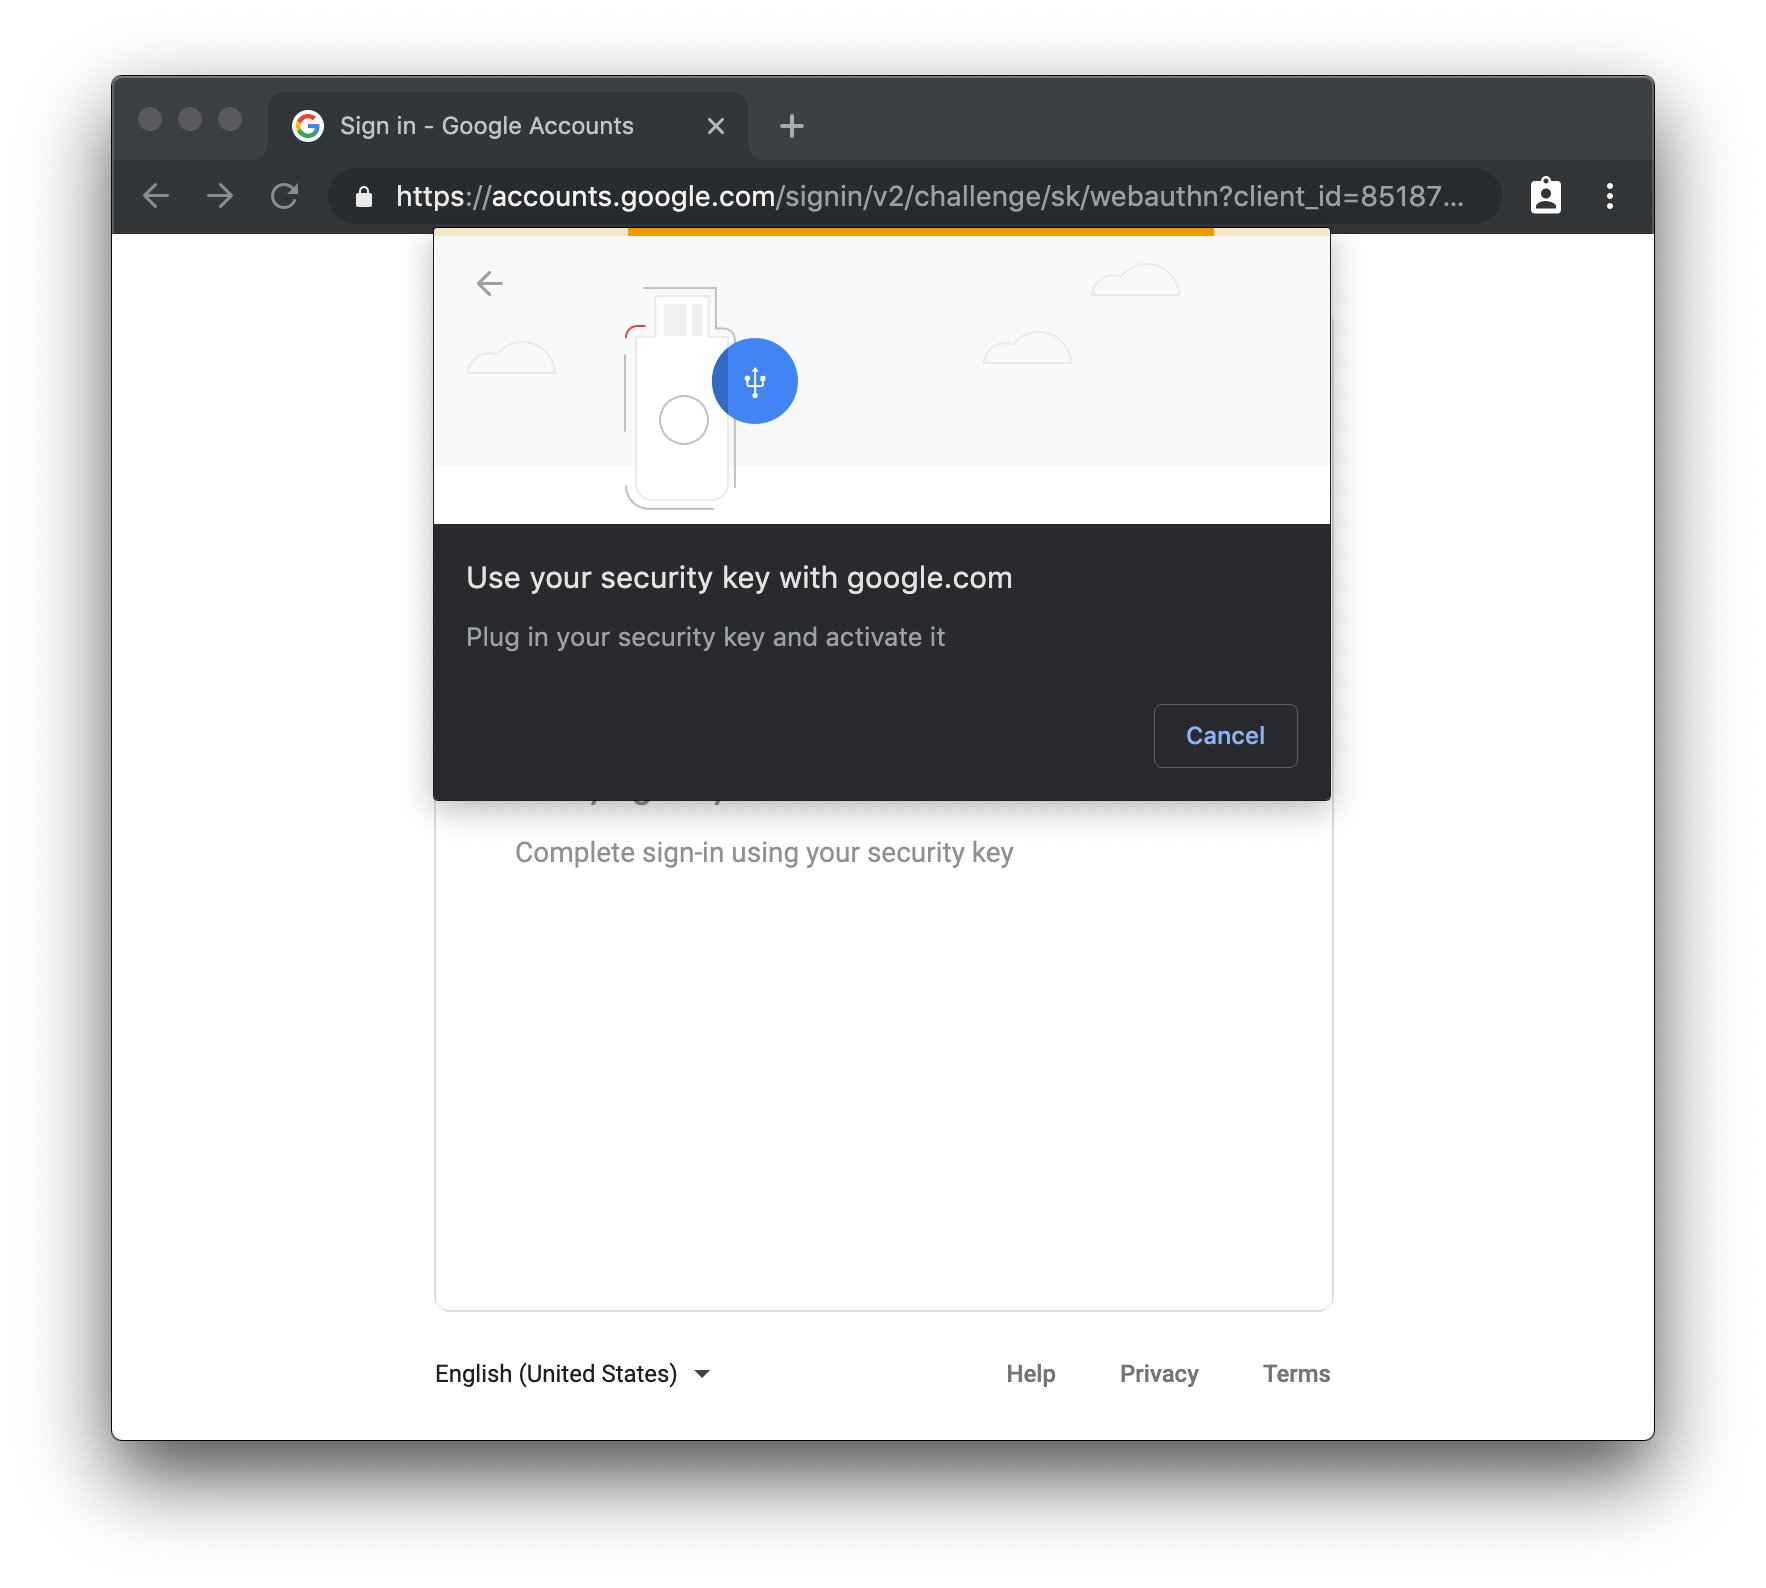
You should be redirected to your identity provider.
If you've enabled multi-factor authentication you should see that too.
If that user is authorized to see the httpbin service, you should be redirected back to httpbin!
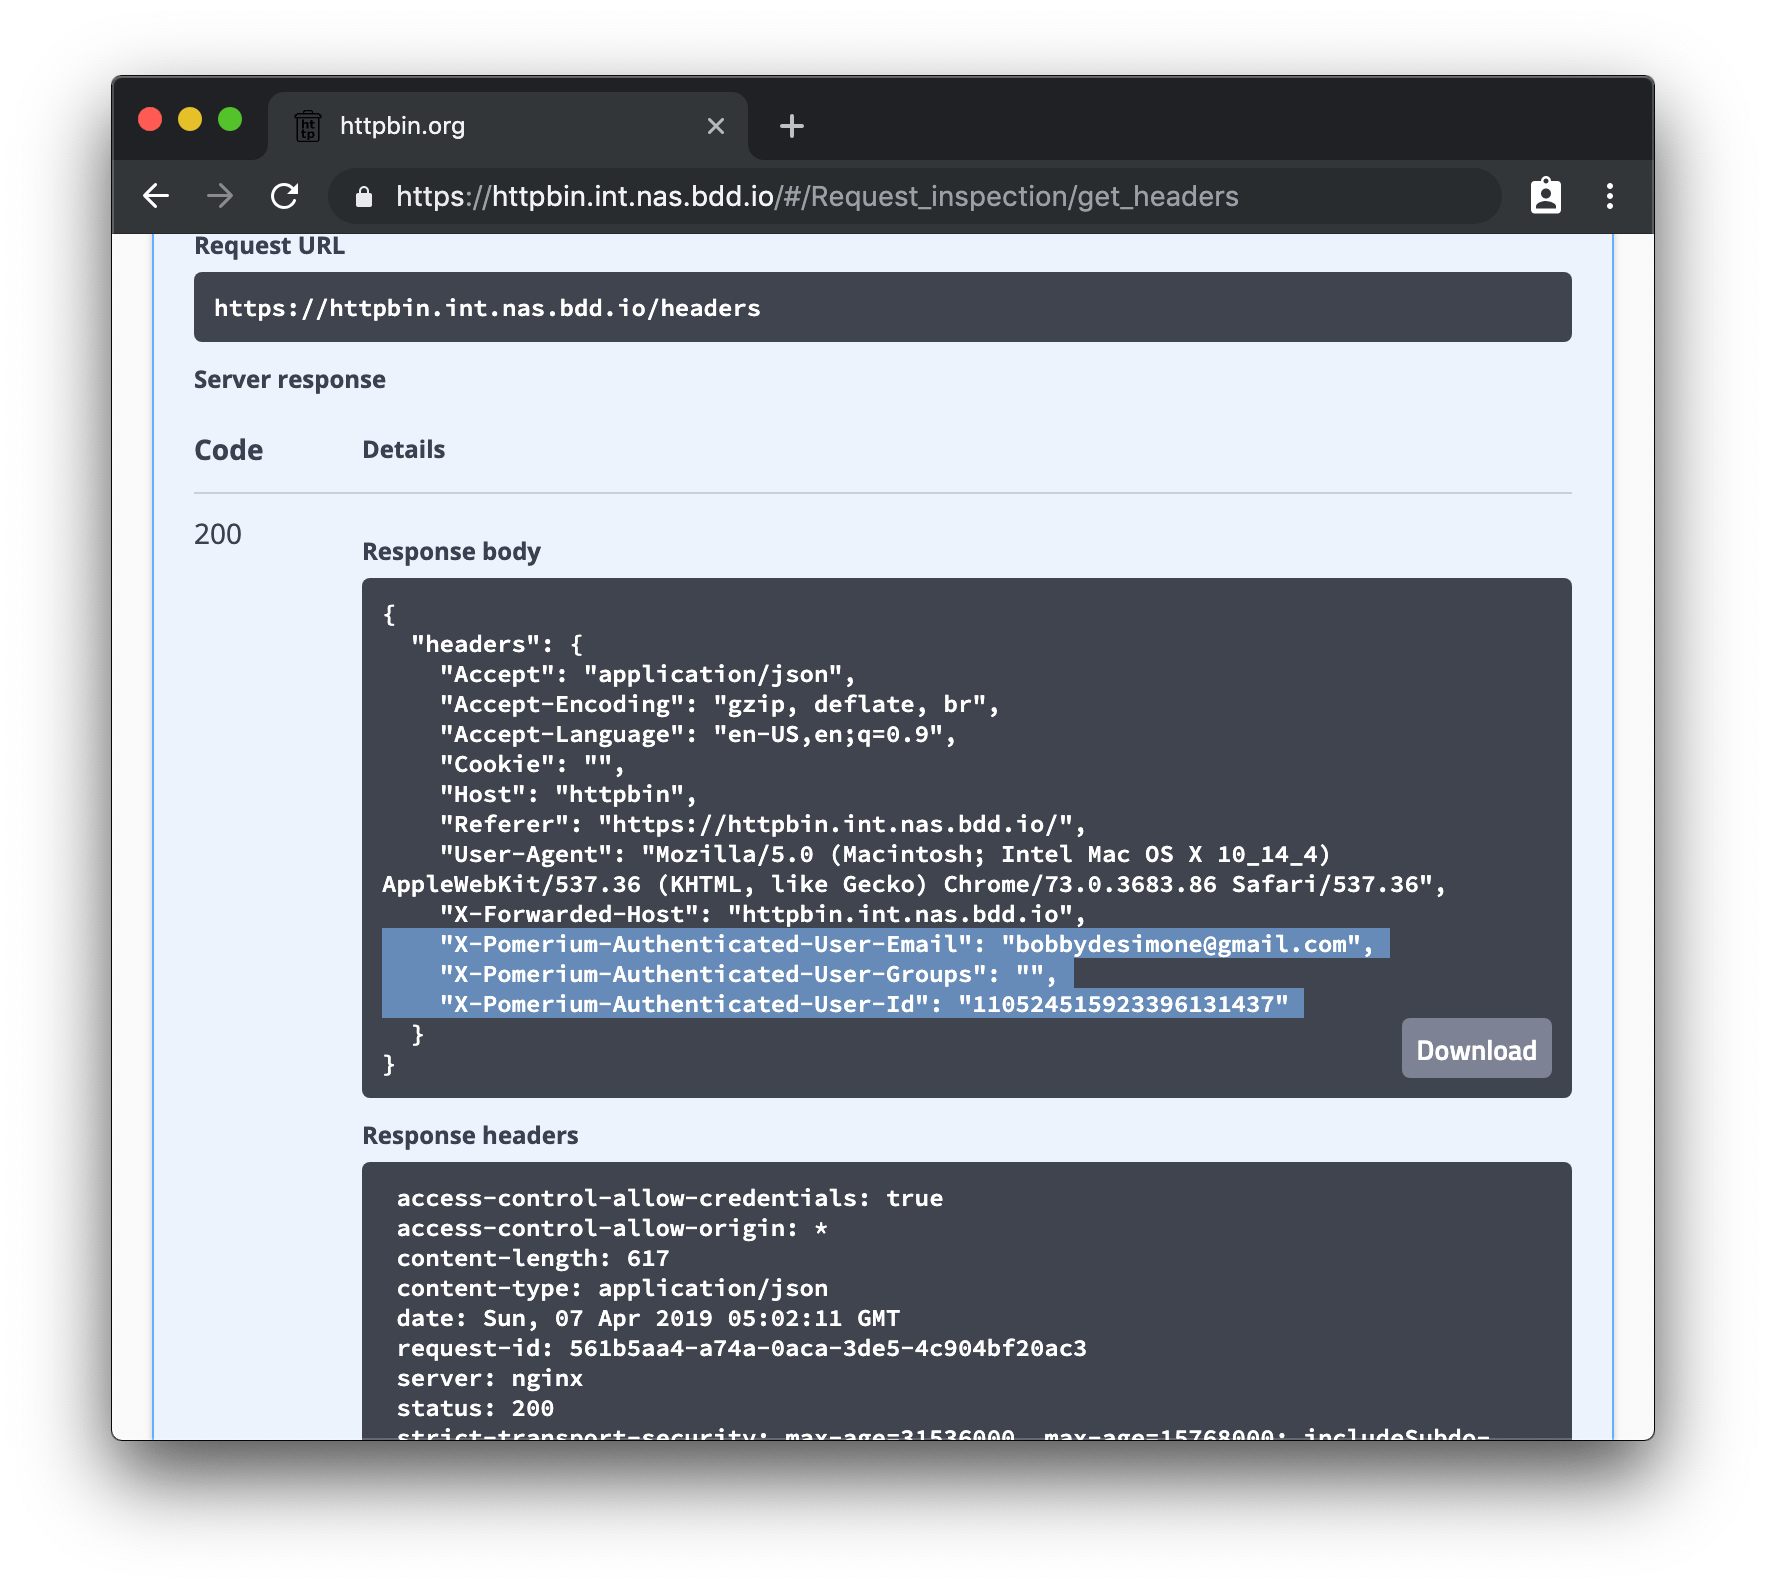
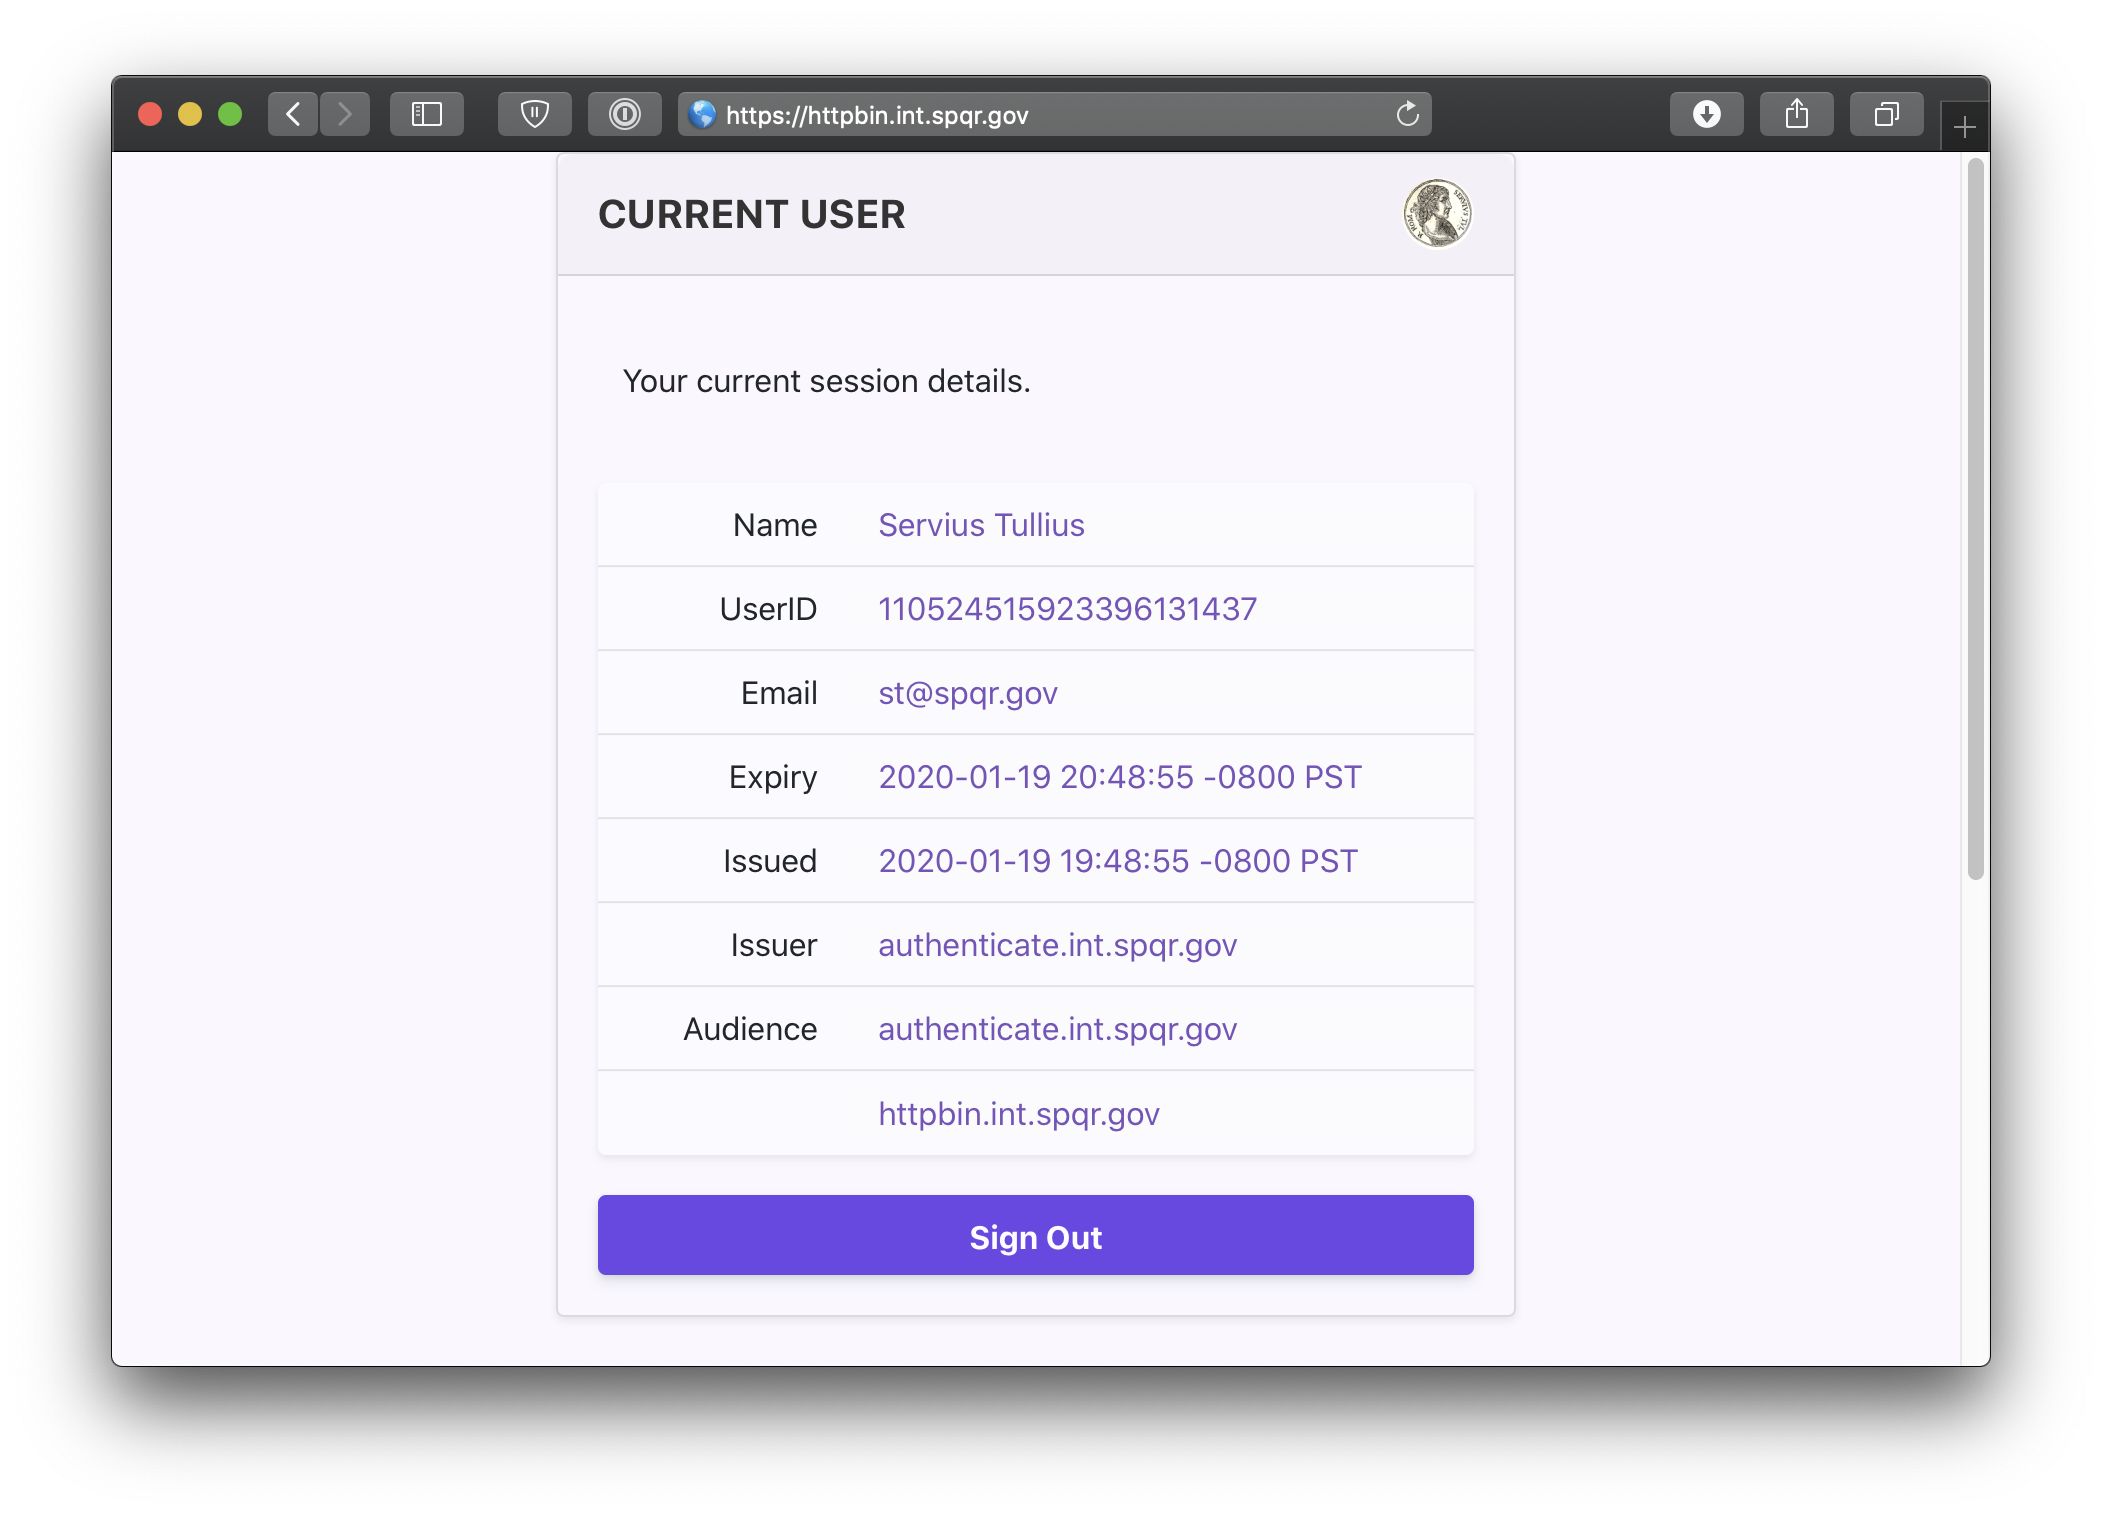
You can also navigate to the special pomerium endpoint httpbin.your.domain.example/.pomerium/ to see your current user details.
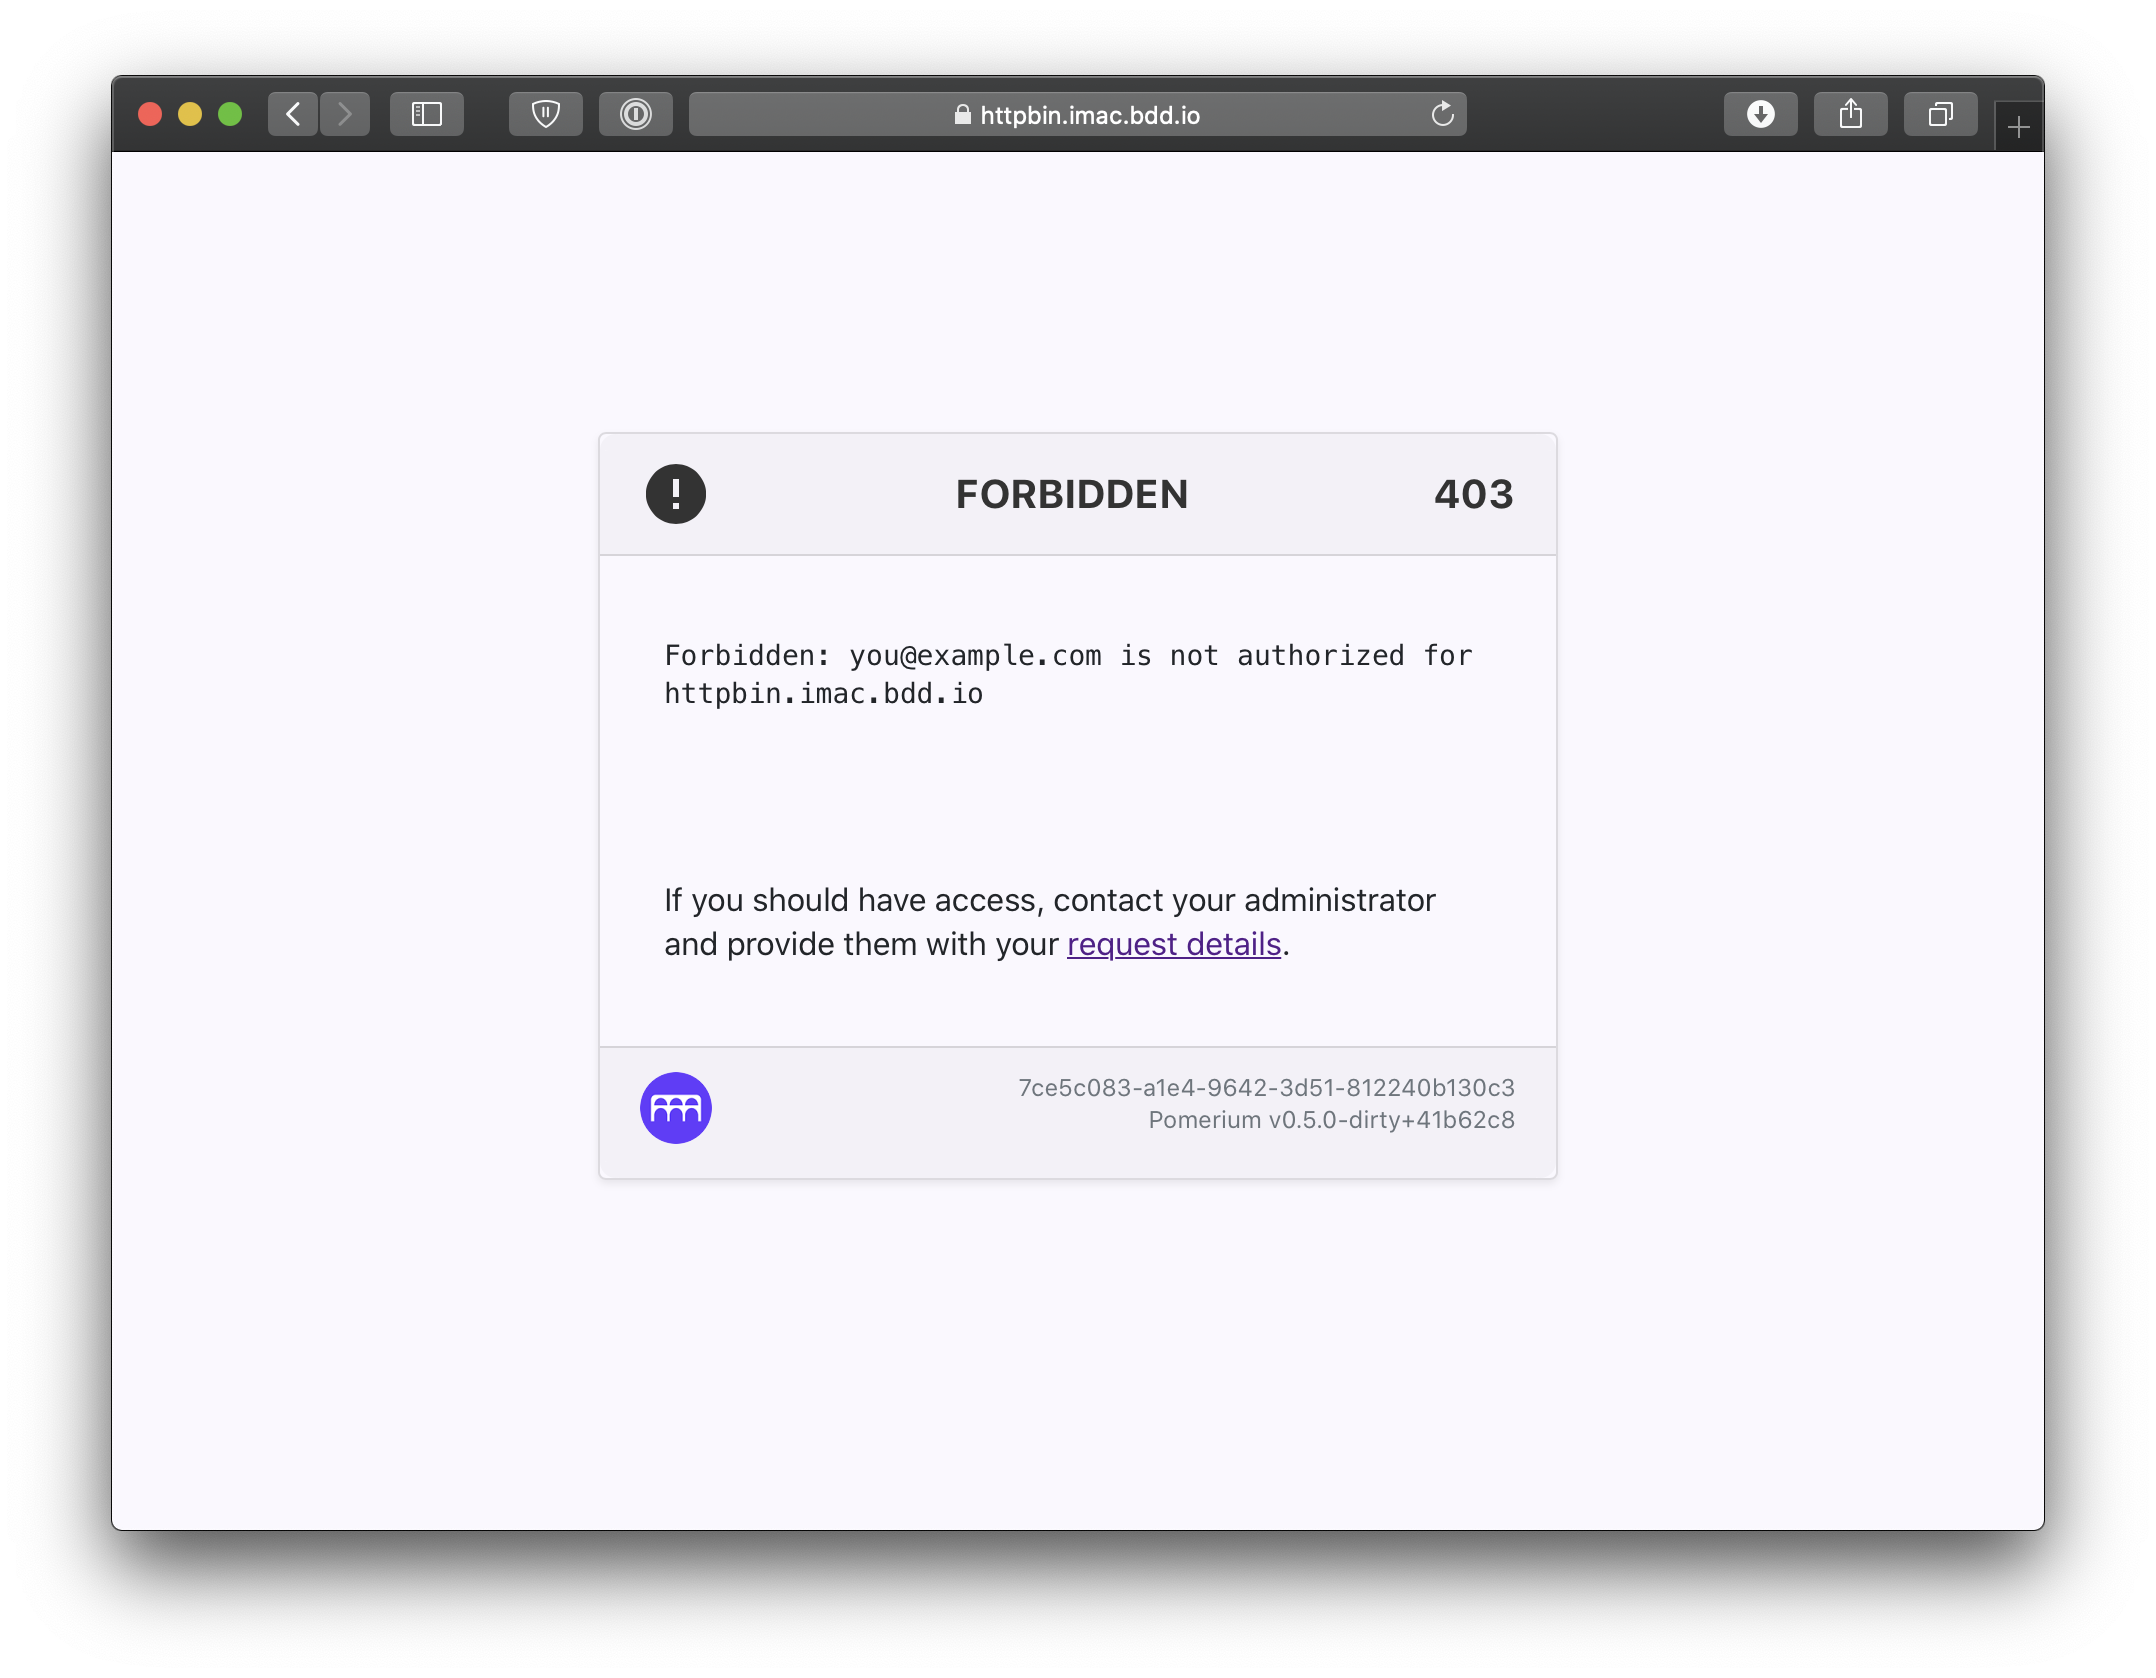
And just to be safe, try logging in from another google account to see what happens. You should be greeted with a 403 unauthorized access page.